The sharing files and folders in local network is a fundamental requirement both in business and home. Windows operating system offers excellent integrated tools to create a shared folder, allowing authorized users to access documents in real time from different locations. In this technical guide we will see step by step how to configure sharing, protect data and correctly manage access permissions.
Preliminary Operations to Share a Folder
Before you activate a directory sharing, it is essential to check that the network infrastructure is properly set. You need to enable file sharing and printers at the operating system level and make sure network firewalls do not block the doors of the sMB protocol (Server Message Block), the reference standard used by Windows for local data transfer.
The next step concerns security: it is crucial to establish exactly who will have the right to access the resource. Following the best cybersecurity practices, we strongly recommend you create user accounts dedicated exclusively to network access, avoiding distributing the credentials of your personal accounts or administration.
How to Configure Network Settings on Windows
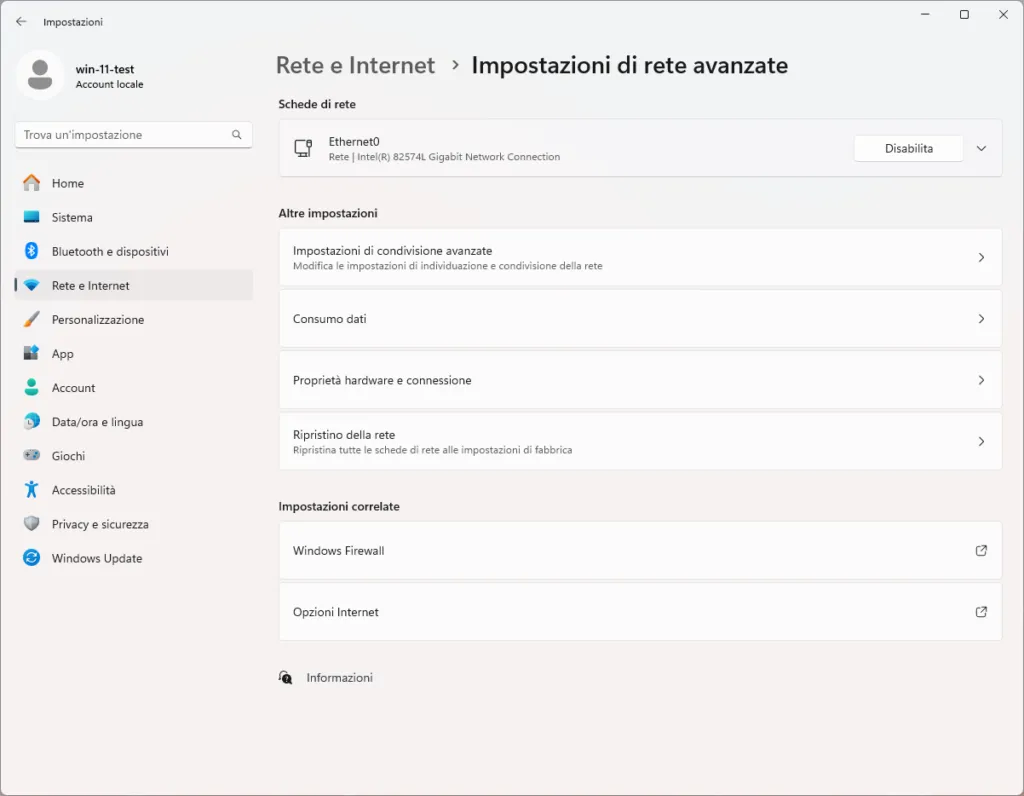
The ability of the service is managed by Network and sharing centre (accessible via the Control Panel). Entering the “Edit Advanced Share Settings” section, you will notice that Windows separates networks into different security profiles (Private, Public and Domain). To share risk-free files within a trusted LAN, you must ensure that the current network profile is strictly set to “Private”.
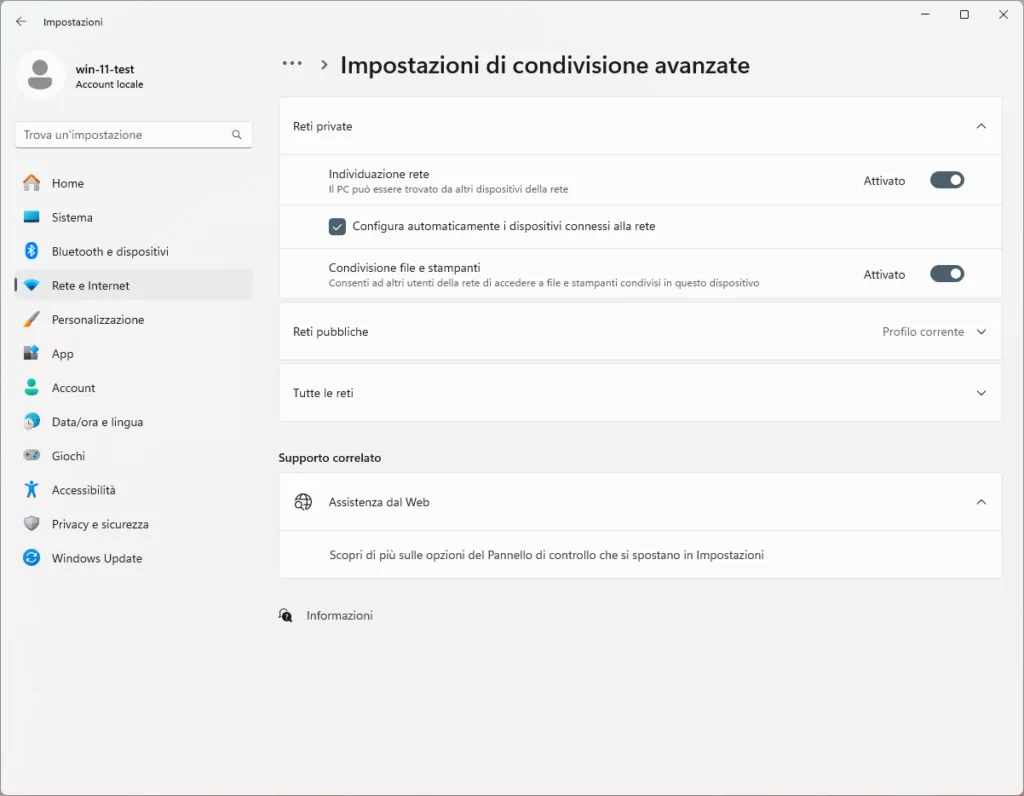
Within the “Private” profile, it is essential to check and activate the following options:
- Enable network detection: makes your computer visible and detectable to other devices connected to the same Wi-Fi or Ethernet network.
- Enable file and printer sharing: physically turns on the necessary features for the exchange of resources using the SMB protocol.
Remember that these configurations must be enabled both on the computer that will physically host files (the server) and on the computers of colleagues or family members who will have to consult the resource (the clients).
Security Management: Create Users and Groups
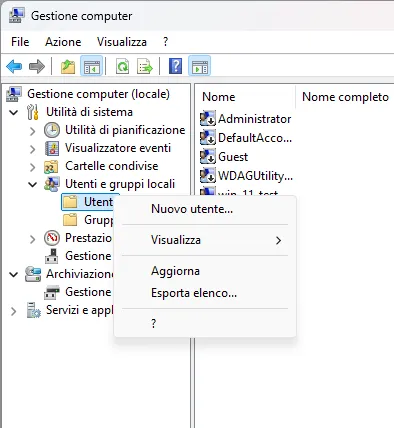
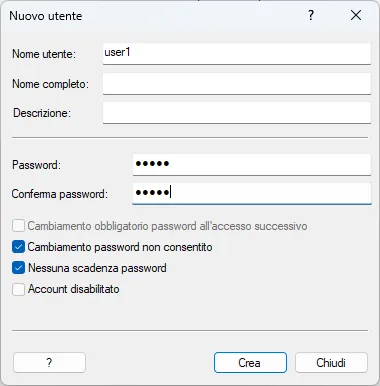
To manage access in a scalable way, we suggest you create ad hoc utilities. Open the tool Computer Management right-click the “This PC” icon (or using the Windows search bar). In the left-hand menu, expand “Local Users and Groups” and click on “Utenti”. Right-clicking in the white area and selecting “New user”, you can generate network accounts with your own secure login and password.
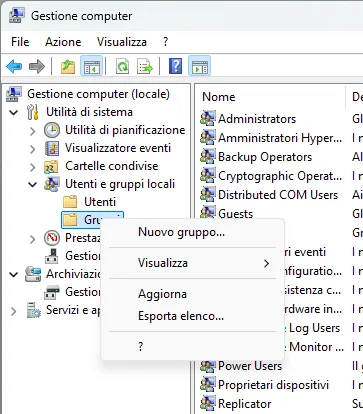
If your network counts many accesses, grouping employees will save valuable time. Always on the same screen, select “Groups” and start creating a “New Group”. This practice allows you to unify permissions under one label (for example, by creating the “Administration” group): by assigning a permit to the group, all members will automatically inherit the same access authorisations.

Procedure to Share a Folder on the Net
System preparations have been completed, it is time to make the directory operational. Right-click the folder you want to publish in LAN and select “Properties”. Move to the Named Card Sharing and click with confidence on the “Advanced sharing” button.
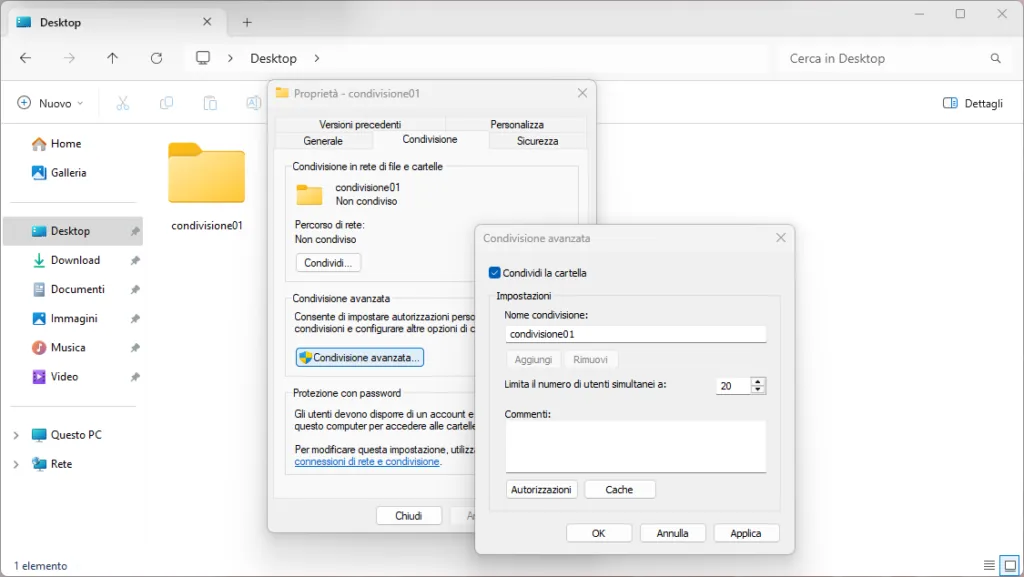
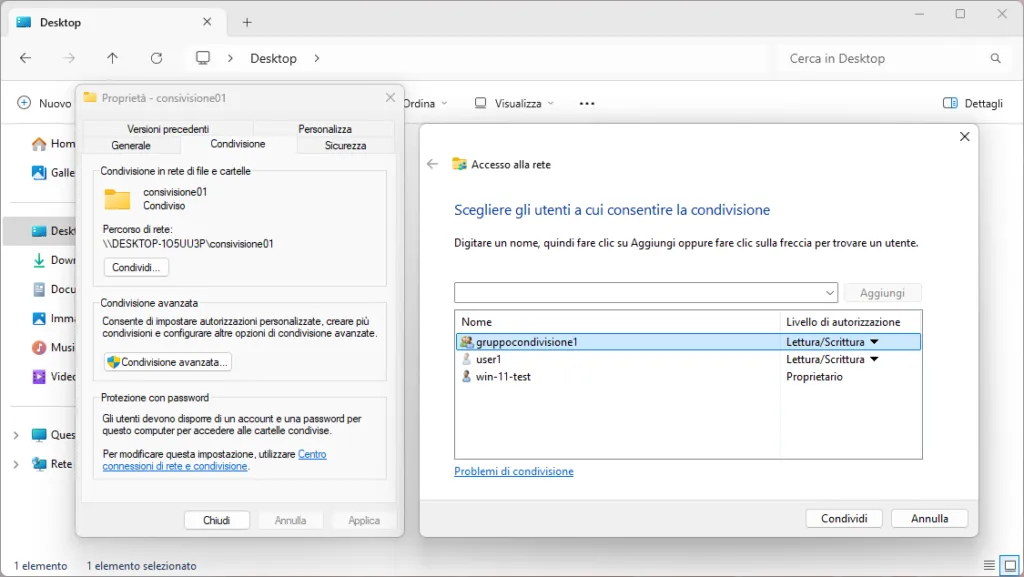
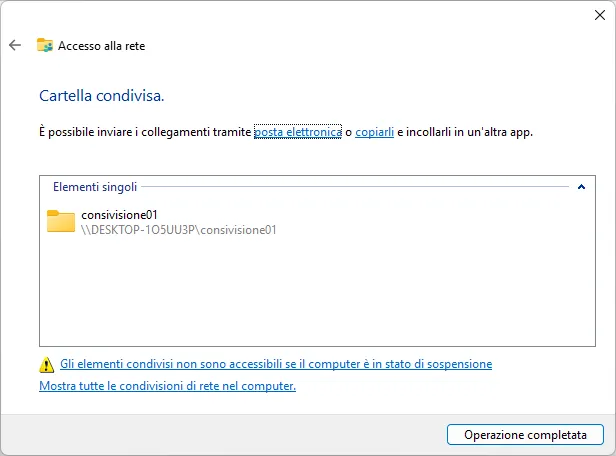
In the popup that opens, enter the check on “Share this folder”. The “Name Sharing” field will define how the archive will appear on your colleagues’ monitors. To decide who can interact with your documents, press the “Authorizations” button located just below.
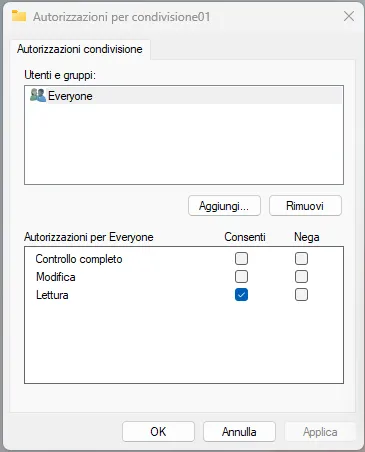
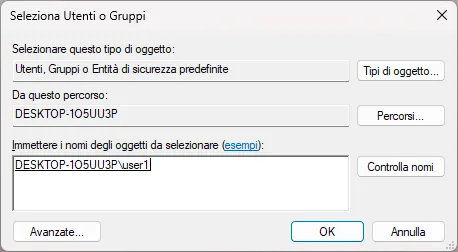
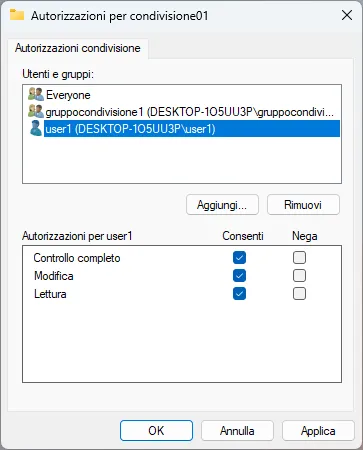
In the card Network permissions, you will find by default the “Everyone” group set in read-only. We highly recommend that you remove it. Instead, use the “Add” button to recall specific users and groups created above, giving each appropriate privilege (chosing between Full control, Edit or the simple Reading).
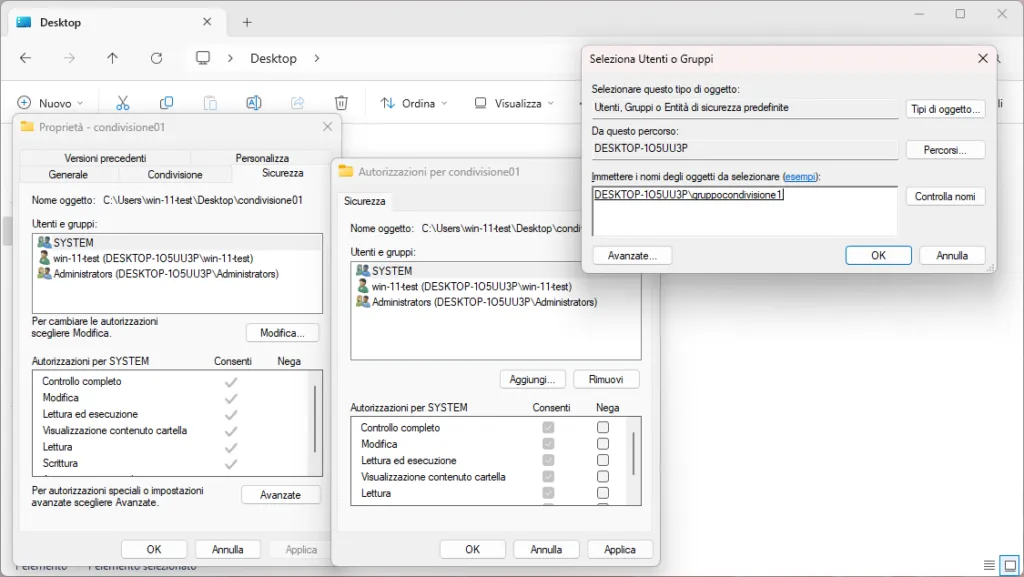
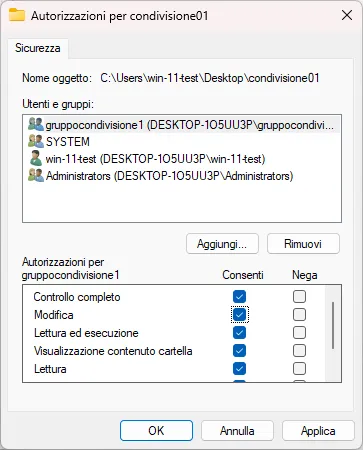
Be careful: sMB rules are not enough to guarantee security. You must also configure local disk-level permissions, NTFS permissions. From the folder properties window, move to the tab Security and press on “Edit”. You will have to replicate the restrictions here, adding the same profiles. Please note that if NTFS permissions are more restrictive than SMB network permissions, Windows will always apply stringent limitation by blocking unwanted access to files.
How to Access the Folder Shared by Other PCs
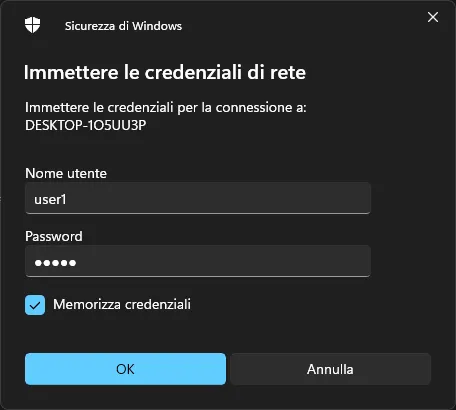
You can finally test the entry from external devices. On another computer connected to LAN, open Explore files and navigate to the address bar at the top. Type the network path here (in UNC format) using the local IP address, for example \\IndirizzoIP\NomeCondivisione. Alternatively, you can use the host computer name directly: \\NomeComputer\NomeCondivisione and press the Enter key.
Map a Network Unit for Rapid Access
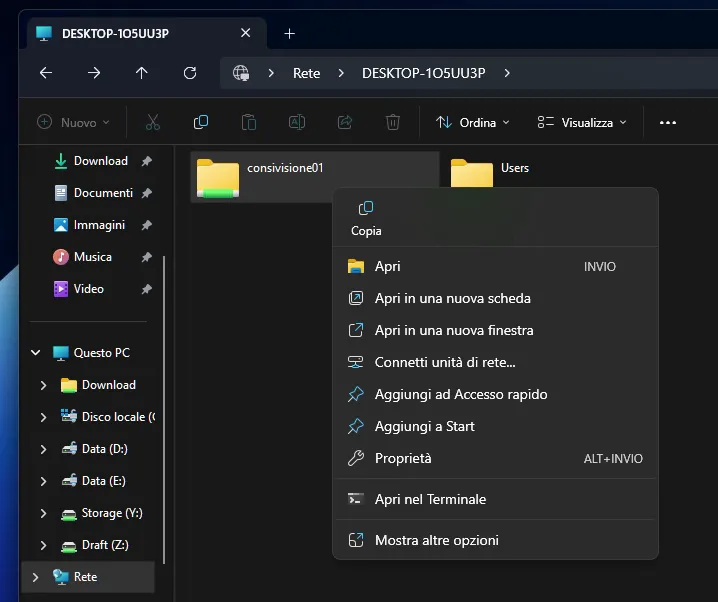
If this shared resource is consulted daily, the best solution is to create a fixed, visually identical connection to a hard disk or a USB stick. Reach the directory via File Explorer, right click on it and choose the entry Connect network units (or Network Drive Map). Choose a letter from the alphabet (e.g. “Z:”) to be assigned to the virtual drive and remember to check “Reconnect to access”. You will find your server always ready to use under the heading “This PC”.
In conclusion, turning your Windows system into a local file server requires precision, but it’s an operation accessible to everyone. By carefully adjusting your network profile settings, profile groups and passwords well and cleverly align SMB permissions to NTFS storage, you will build a fast, secure and extremely reliable network ecosystem for you or your company.
Frequently Asked Questions about Network Sharing in Windows
What is the difference between sharing permits (SMB) and security permits (NTFS)?
Sharing permissions establish basic access rules when a user connects via the LAN network. NTFS permissions, visible in the Security tab, manage local disk rights. Windows always applies the strictest restriction between the two, so they must be consistent.
How can I find the IP address of the PC that hosts the folder?
Open the Start menu, type “cmd” to start the Command Prompt. Inside, write ipconfig and press Enter. Look for the word “IPv4 Address” under the voice of your connection (Ethernet or Wi-Fi) to read the IP number needed to connect.
Can I share a folder on the network without requiring a password?
Yes, you can go to the “Network and Sharing Center” under “All Networks” and disable the “Safety Password Sharing” option. However, it is a highly recommended practice: disabling anyone who connects to your Wi-Fi or your LAN will have free access to your data without any kind of control.


