In this complete guide we will discover how to record the computer screen using OBS Studio (Open Broadcaster Software), a professional and completely free program. Whether you want to create a tutorial, record a gameplay or save a videoconference, OBS is the ideal tool for achieving high quality results.
OBS Studio compatibility on Windows, macOS and Linux
OBS Studio is an open source software, completely free and free of limitations or watermarks. To start with record your desktop, your computer must meet some minimum requirements: you need a Windows 10 or higher operating system, macOS 11.0 or later, or a supported Linux distribution (you can check the updated technical details directly on the oBS Project official website). Although there are no rigid hardware constraints, the use of a modern processor and a dedicated video card will dramatically reduce the risk of lag and slowdowns during video acquisitions.
In addition to being the perfect solution for pC screen recording, OBS Studio integrates advanced features for live broadcast (streaming) on famous platforms like YouTube, Twitch and Facebook Live.
The real strength of this program lies in the management of multimedia sources. It combines different video and audio sources in real time. For example, it is possible to overlay the recovery of webcam the recording of the monitor, or capture the microphone audio along with computer system sounds, creating a real virtual direction.
How to download and install OBS
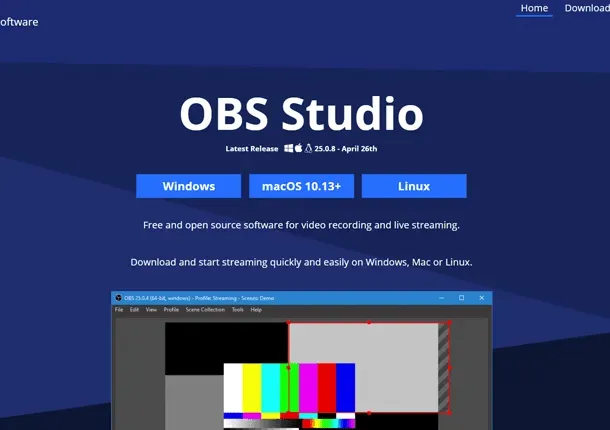
The first step to start is to download the program. Connect to the official OBS download page and select the operating system in use on your device. By clicking on the Windows icon, macOS or Linux, you will immediately start downloading the most up-to-date installation file for your platform.
At the end of the download, open the executable file just obtained (for example, OBS-Studio-Full-Installer. ex in Windows environment or package . d for the Mac ecosystem).
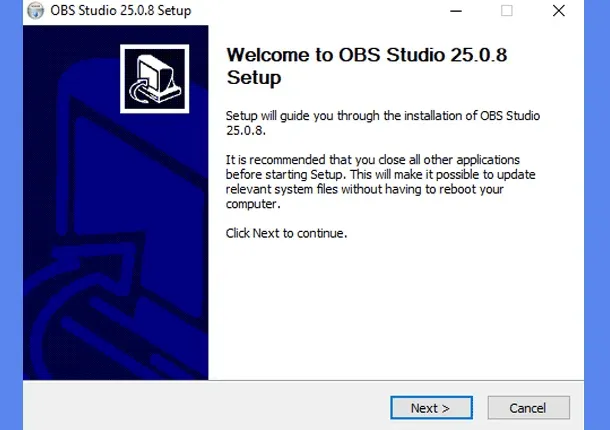
If you use Windows, start the wizard by clicking on Next. Accept the terms of use of the software by clicking again Next, choose the destination folder and press the button Install to proceed. Once the operation is finished, click on Finish to close the setup and automatically launch OBS Studio.
For users Apple, the procedure on macOS is just as intuitive: just drag the OBS Studio icon inside the folder Applications. Next, double-click the application (confirming the opening via the button Open it to authorize third-party software according to protocols apple Security). Now you're ready to start recording.
Practice Guide: How to Record Screen with OBS Studio
With the application started, the time has come to run the initial configuration to optimize the video capture and audio acquisition. The instructions you will find below are identical for both the Windows interface and macOS interface.
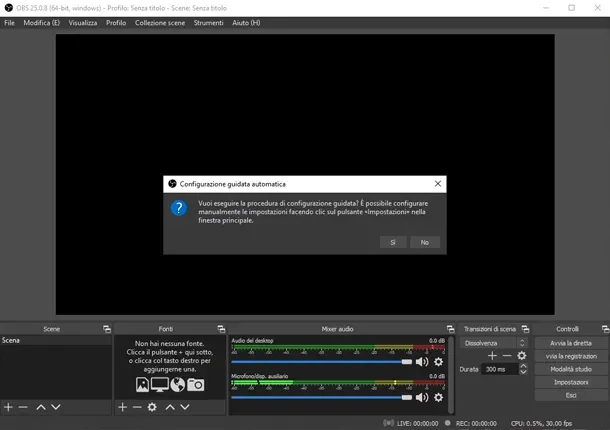
At the first start, the software will show a message that proposes the Automatic Guided Configuration. Click on Yes to continue. Since the goal of this tutorial is to save files locally, select the option Optimizes only for recordings, I don't make direct and press the button Come on.
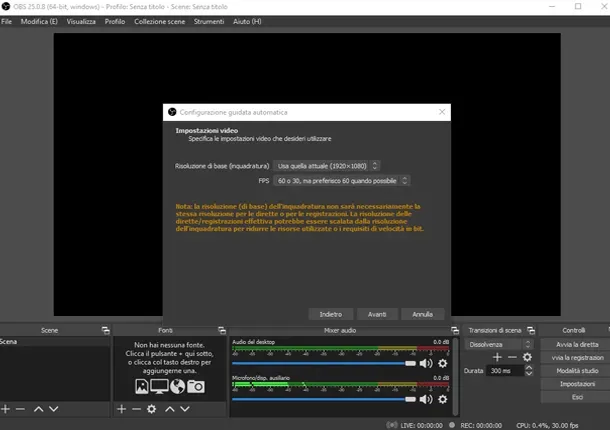
In the next screen related to the video settings, I suggest you keep the parameters proposed automatically (which will detect the native resolution of your screen) and confirm by pressing Come on. Finally, click on Apply settings to save this preliminary configuration.
Your work environment is now configured. We see concretely how to train the program for capture your PC desktop.
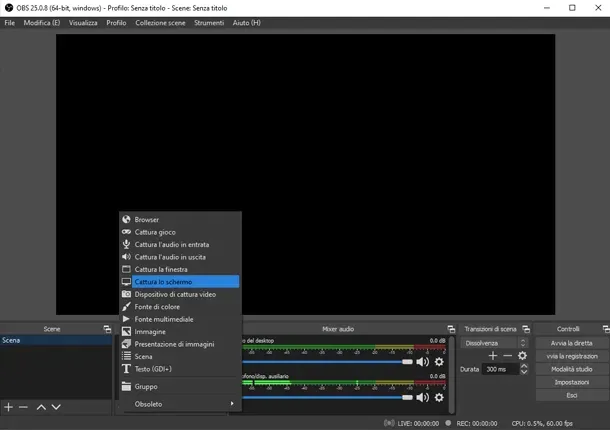
Positioned in the section Sources, located at the bottom left of the interface, and click on the button + to open the capture options menu. Select the item Capture the screen and click on OK in the dialog box that will appear to confirm the addition.
A preview of the recording will now be shown. Through this window you can decide to hide the mouse pointer by removing the check from the box Capture the cursor. In case of multi-monitor configurations, the drop-down menu Screening will let you select exactly which display to record. Once satisfied, press again OK.
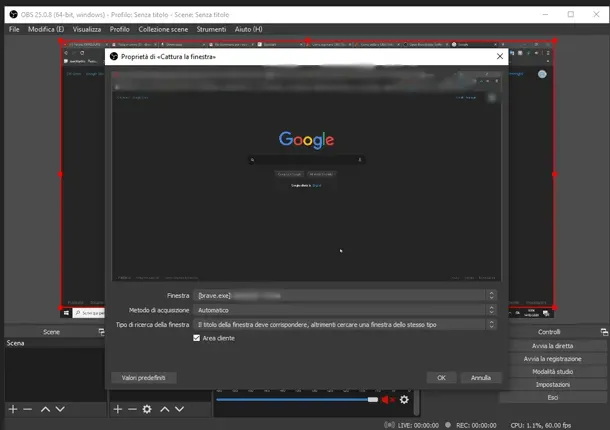
There is also the option to record a single window, useful if you want to show only a certain application (such as a presentation or browser) by obscuring the rest of the desktop. To do this, press the button + in the window Sources and select Capture the window.
Confirmation with OK and, through the appropriate drop-down menu, choose the specific window that the software will have to frame. Here you can also exclude the cursor by removing the appropriate check. End the changes, click on OK.
Capturing the entire screen in which OBS is opened, you may notice an infinity “mirror effect”. This happens because the program is recovering itself in loops. Do not alarm yourself: this visual effect will disappear as soon as you reduce to OBS icon to switch to the program you really want to show.
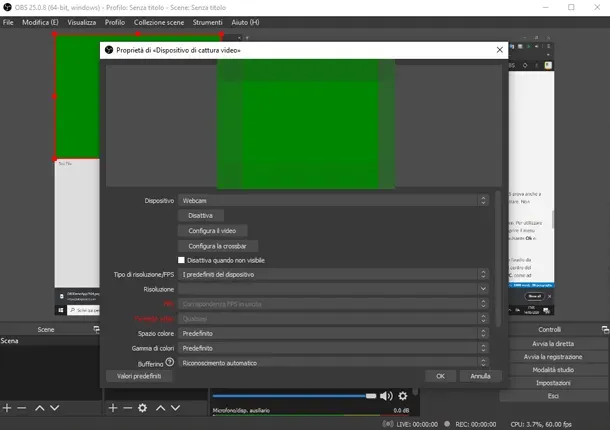
To enrich your video, you can add your video webcam to register in miniature (picture-in-picture effect). In the window Sources, click on the button + and select the item Video capture device.
Click on OK and, from the new property screen, select the name of your webcam from the drop-down menu Device. Confirm again with OK to add it to the active source list.
You can customize the location of the webcam by holding the left button on the video preview and dragging it into the corner of the screen you prefer. Similarly, use small red squares on the edges of the pane to resize the shot at your liking.
Before starting the “ciak”, it is essential to control the audio. See section Audio mixer, located at the bottom of the control window.
In this area you will find the channels that regulate theDesktop Audio (such as music, system sounds or audio of a game) and the channel dedicated to your Microphone connected to the computer.
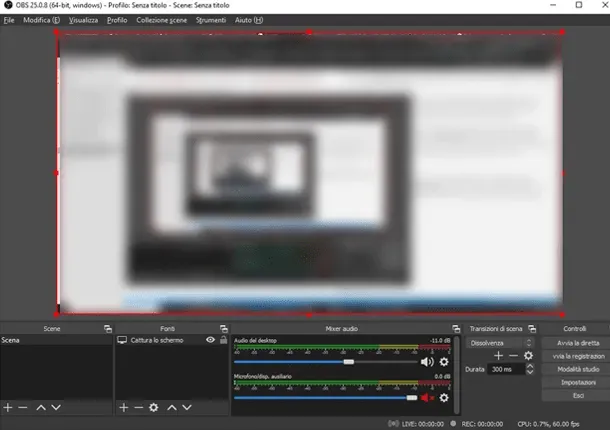
To disable or reactivate the volume of a specific sound source, click on the speaker icon placed under the decibel levels. You can use the sliding blue bar to balance the sound power, ensuring that the peaks do not enter the red zone to avoid annoying distortions.
As last step, you have to set the technical quality of the file. Click on the button Settings, located at the bottom right, and choose the tab Exit from the side navigation menu.
In the section dedicated to Registration, use the button Browse to choose the folder of the PC where all future videos will be saved. With regard to Quality of registration, the advice is to keep the default setting High quality, medium file size, lowering it only in case of extremely long recordings or limited disk space.
Make sure you select a Recording format appropriate. I suggest you set the format mp4 or mk, as they offer the best hardware compatibility: you will have no problem sharing videos on smartphones, smart TVs or uploading them directly online on social media or YouTube.
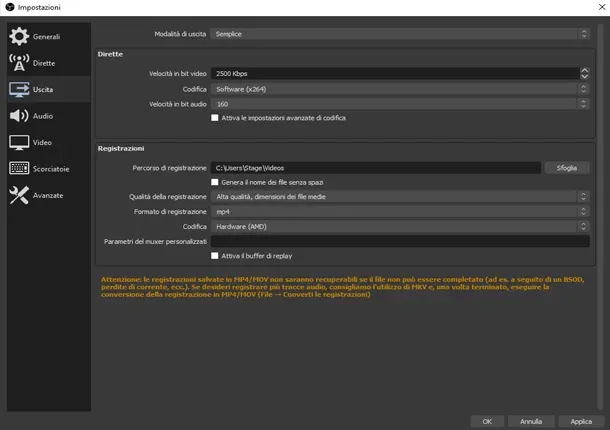
Ultimate your preferences, press the button Apply and then OK to return to the main screen. Everything is ready: click on the button Launch the registration present in the controls at the bottom right to start framing your desktop.
When you want to stop the acquisition, just bring the OBS interface to the foreground and click on End registration. The processed and ready-to-use video file will be available immediately within the previously selected folder. Really easy and intuitive!
Frequently Asked Questions (FAQ) about OBS Studio
Does OBS Studio affect PC performance while recording?
As a highly optimized program, the impact on the system is generally contained. However, fluidity depends on the hardware in use. To limit any frame rate or lag falls, it is recommended to use dedicated hardware encoders (such as NVENC for Nvidia cards) in video settings and to close heavy applications in the background.
Is there a maximum limit time for screen recording?
No, the software is completely timeless. The duration of your desktop recording is bound exclusively by the free space currently available on your hard drive or on the SSD of your rescue device.
Can I use OBS to extract only audio without recording videos?
Of course. You can start a recording while keeping the “Sources” video section completely empty. Make sure that the microphone or desktop audio levels are active in the “Mixer Audio”. At the end of the recording you will get a video file from the black screen containing only the captured sound track, easily extractable in MP3 format using conversion software or video editing.


