Dolphin Emulator is considered the best software ever for console emulation Nintendo GameCube and Nintendo Wii. An extremely reliable program that allows retrogaming enthusiasts to relive the great classics of the past, offering an excellent alternative to those who want to expand their library beyond the latest consoles like Nintendo Switch. This ultimate guide will illustrate all the steps necessary to download, install and optimize the emulator.
Below are the detailed instructions for Dolphin Emulator configuration on PC Windows, systems Mac and smartphone or tablet Android.
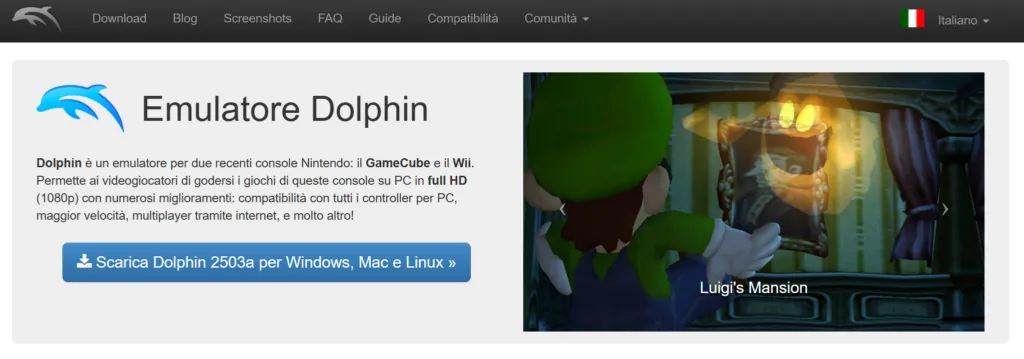
Download and Install Dolphin Emulator for Windows and Mac
Dolphin Emulator is perfectly compatible with the main desktop operating systems. Let's see in detail the correct installation procedures to get the best performance.
Install Dolphin on Windows: The portable Beta version
For Windows PCs, the optimal choice falls on the use of portable Beta version. Unlike the classic setup file, this release receives constant updates from the community of developers and does not require invasive installations in the registry.
Here are the complete steps for configuration on Windows 11 (the procedure is similar also for previous versions):
- Make sure you own software to manage compressed archives in format .7z. We suggest you use 7-Zip. You can download the 64-bit version from official website of 7-Zip and carry out the standard installation.
- Posted on the official download page on dolphin Emulator website.
- Find the last beta version available, generally placed at the top of the list.
- Click on the button Windows x64 to start downloading.
- After downloading, open your “Download” folder and find the file you just downloaded.
- Right-click the archive, and if necessary select “Show other options”.
- Choose 7-Zip from the context menu and click on Get out here.
- A new folder containing the ready-to-use emulator will be created.
- Important: Being a “portable” version, you don’t have to install anything. To start the emulator, you will only double-click the executable file called Dolphin.
Our advice: To always have the emulator at your fingertips, move the entire folder extracted on your Desktop or within the “Documents” system folder.
How to install Dolphin Emulator on Mac
The installation on the macOS environment is just as intuitive and follows the logic of the portable version for Windows. Also in this case, the Beta version is strongly recommended to exploit the latest optimizations.
Follow these simple steps:
- Visit the official website of Dolphin.
- Select the Beta version download by clicking on macOS (ARM/Intel Universal). This file is universal: it works perfectly both on the latest-generation Macs with Apple Silicon (M series) chips and on previous models with Intel processor.
- Once you get the file, go to the “Download” folder and double-click the file . DMG downloaded.
- A virtual disk image will be mounted: drag or launch the Dolphin application icon in its interior.
Safety note: macOS may show you a warning by blocking the opening because the app comes from the Internet. Just confirm your choice by clicking the button Open it.
Configure the game folder (ROM) on PC and Mac
To keep order and make sure Dolphin automatically finds your titles, you need to create a system directory dedicated to GameCube and Wii ROMs.
- Choose a convenient location on your hard drive (e.g. “Documents” folder).
- Right click, go New and then Folder.
- Rename the folder clearly, like “ROM Dolphin” or “Giochi Nintendo”.
- Open Dolphin Emulator. On the main screen you will find a message that invites you to double-click to add a directory. Follow education.
- Navigate between the computer paths, select the newly created folder and confirm.
- From this moment, every ISO or ROM file you will copy in that folder will magically appear in the main program library.
Our advice: This practice is essential to avoid having heavy files scattered around your computer, both on Windows ecosystem and Mac.
Now that the environment is ready, you just have to start your first game session.
How to start a game on Dolphin Emulator
To play, you need the titles (ROM or ISO) image files. Remember download ROM from the internet is considered illegal. The correct procedure for legal protection provides for the use of “dumping” software to extract the ROM directly from the original physical disk in your possession.
Once you get the game file, boot is elementary:
- Drag or copy the game file inside the previously created ROM folder.
- Open the emulator. The title should appear immediately on the list in good view.
- Select the game with a click.
- Press the button Play (Play) located above the toolbar.
- The game will start in a new window.
Dolphin Emulator is designed to work optimally at the first start. The preset parameters, in fact, guarantee stability and fluidity without the need for drastic interventions. However, if you want to customize the controls or enhance the graphics, the next paragraphs do for you.
Advanced configuration of Dolphin Emulator on PC
The great advantage of this emulator lies in its excellent native balance: the “Factory” options can support stable frame rate on the majority of today’s PCs. Even the controls are already pre-maps functionally on your keyboard.
Since Windows and macOS interfaces are almost identical, the instructions below apply transversally to both systems.
How to map and configure the controller
Adjusting the game commands is vital. Although the keyboard works, the game experience reaches the peak only through the use of a gamepad. Using an original GameCube controller via USB adapter is undoubtedly the best option to replicate the exact feeling created by Nintendo developers.
Here is the correct procedure to match and set the keys:
- Launch the Dolphin application.
- On the top bar, click on the icon Controller.
- You will notice two distinct boxes: the upper part is dedicated to GameCube commands, the lower part of Wii remote controls (Wiimote).
- Select Configure at “Controller GameCube 1”.
- A panel containing all inputs will open (frontal, dorsal and analog stick buttons). Click on each visible button on the screen and press the respective button on your physical joypad to map it.
- Extra board: You can create multiple saves (e.g. keyboard profile, Xbox pad profile). Write the command set name in the top right pane “Profile” and press Save.
- Press OK at the end of the operation.
Good to know: The software automatically recognizes which console the game is initiated by the switch (exchange) between GameCube and Wii mapping.
If you realize that you made a mistake during the key assignment, don’t worry: just press the button Predefinition to reset everything to the initial values and start from zero.
Optimize graphic settings
Dolphin prefers fluidity from the very high basic resolution. If you have a medium-high-end PC, you have a huge margin to significantly improve the visual compartment, upscale the resolution far beyond the original console.
- Open Dolphin and click on the icon Graphics in the upper bar.
- The options window is divided into: General, Improvements, Hack and Advanced.
- Help in real time: Leaving the mouse cursor stop over an option for a second, the emulator will show you a small text window (tooltip) explaining exactly the visual effect of that parameter.
- Move to the tab Improvements (Enhancements). Here you can dramatically increase the Internal resolution, bringing the image in 1080p, 2K or 4K to remove the “seated” effect (aliasing). Activation of anisotropic or anti-aliasing filters is highly recommended if you have a good video card.
- Click on Shut up to automatically apply all changes.
Proceed by attempts: slowly increase the graphical parameters and test by starting a game. If you notice any frame or audio lag, simply reduce the Internal Resolution to lighten the workload on your computer.
Other useful configuration options
Going to the button Options and then Configure, you will access the technical heart of the emulator. There is usually no reason to touch these parameters unless you are looking for specific bug solutions, but here is a quick overview:
- General: It manages crucial functions such as the use of multiple CPU cores. We do not recommend altering the default entries in this tab.
- Interface: Here you can activate security alerts (e.g. to avoid accidentally closing the program by forgetting to save progress).
- Audio: To be consulted only if the sound should be scratched or jumped.
- GameCube and Wii: Basic diagrams to set virtual memory cards or force a specific region (NTSC or PAL).
- Paths: Here you can view and edit folder paths that the software must analyze to search for your ISO.
- Advanced: It contains the delicate command to “Overclock” the virtual processor of the emulator, useful in games that tend natively to slow down, but be careful because it will push your real CPU to the maximum effort.
- Log / Debug: Tools for exclusive use of programmers and modders.
In summary, just make sure your gamepad is properly configured and uses the graphics card to get the best visual output. Everything else works just as it is.
Dolphin Emulator for Android: Download and Install
Thanks to the technological evolution of current smartphones, turning a heavy emulator like Dolphin on mobile devices has become reality. To date, it is undoubtedly the best Android app for the world Nintendo GameCube and Wii.
The steps to have it on your phone are immediate:
- Search Dolphin Emulator on Google Play Store from your phone.
- Tap on the button Install.
- Alternatively for experienced users, you can get the latest APK Beta file from the official site, to install it manually after activation of the “Unknown Sources” option in Android settings.
We recommend that you rely on the installation via Google Play Store to ensure continuous security and stability updates automatically.
Organize ROMs on Android smartphones
Relying on a unique main folder will avoid confusion in the memory of your smartphone.
- Download and open a file management app as Files by Google or Solid Explorer.
- Access your device's internal memory.
- Create and appoint a new directory, such as “Giochi Dolphin”.
- Move all your ROMs within this position.
Attention: The Android version of Dolphin Emulator does not support direct reading of .ZIP or .RAR files. You must necessarily disappear the archives and insert the pure ISO image inside the folder before proceeding.
Small trick: If you maintain an isolated folder, you will never risk accidentally deleting a rescue or a game at the time when you go to empty the unordered General Folder “Download”.
Configuration of the emulator on Android
The mobile version approach is almost identical to the Desktop counterpart. Here too, the main focus to get a good experience lies in optimizing commands and smoothing some graphic uncertainties dependent on the power of the phone processor.
Set screen and hardware controls
Playing on a smartphone puts you in front of a crossroads: use the Touch virtual buttons on the screen or connect a dedicated external joypad.
Customize Touch Controls
- Open the Dolphin app and start a ROM.
- During the game, swipe from the edges (or press the “Back” button) to recall the emulator’s pop-up menu.
- Tap on Overlay controls.
- Selecting Edit Layout, you can physically reposition and move buttons around the display by adapting them to the size of your hands. Tape Done when you are satisfied.
- Using the option Control Rule, you will be able to resize them and adjust their transparency not to cover too much the graphics of the game.
- If you use a physical pad, from this screen you can turn off virtual buttons by touching Active/Disable All at the bottom of the list.
Important: The custom layouts are unfortunately repeated for each single game started the first time. It is a temporary limitation that developers are setting up.
Connect a physical controller (Bluetooth or USB)
- Pair your controller over the phone via Bluetooth (e.g. Xbox Pad or PS5) or with a USB OTG cable.
- From the homepage of the Dolphin app, tap the icon of thegear.
- Enter the voice Input GameCube.
- Tap on GameCube 1 controller and choose the setting Emulated.
- A long text list will open: just like on PC, you will need to tap the action name on the screen and then crush the real key on the joypad, to create a one-to-one mapping.
- After completion, return to the menu.
- Go to voice Input Wii to repeat the same assignments.
- Start the game and enjoy full screen without touch controls to bother.
Remember that hiding touch keys requires the use of the option mentioned in the previous paragraph (Activa/Disable All). In addition, the software for Android also supports original Nintendo hubs if equipped with the appropriate Type-C adapters.
Graphic settings for Android
The app is pre-optimized for the SoC of your smartphone, but in case of overheating or slowing graphics you may need a fine tuning:
- Scratch the icon of thegear from the base screen.
- Come on Graphic settings.
- If you experience severe continuous micro-scatti, lower your voice Shader Filling Mode. It could create short lag in the first seconds of a level, then stabilize. It should only be used on old entry-level smartphones.
- In Improvements you can increase Internal resolutionbut be careful not to push the values too high or you will stumble into the feared Thermal Throttling (surheating and stopping).
- Hold on top of each option in the menu Hack to read very useful tip comics on which to disable to recover FPS.
- In Statistics you will be able to enable the FPS counter, very convenient to analyze in real time if the changes just applied bring objective improvements.
- The card Advanced finally allows you to paste texture packages in amateur HD or activate the Widescreen Hack.
Dedicate us of time and proceed slowly. Each phone behaves differently according to the supplied processor (Snapdragon, Exynos or MediaTek).
Other advanced settings (Android)
In the menu accessible with a tap on the gear and then up Config, you have some high-level technical utilities.
- General: Here you can turn on the desired Save States (the instant quick saves). Use them with discretion: they can corrupt some games.
- Interface: It allows, among other things, to enable the Dark Mode of the layout.
- Audio: In case of very marked acoustic lag, activate the special voice “Audio Stretching”.
- Paths: Essential to identify and decide which Dolphin directories should write the rescue files of the game itself.
- GameCube and Wii: Basic settings identical to the fixed computer counterpart, including virtual SDs.
- Advanced: This is where Virtual Overclock resides. Ignore this option on smartphone: it will stress over the battery by burning its autonomy in a few minutes.
- User Data: Basic tool! Use it periodically to export and make total backup of your saves, avoiding bad surprises in case of random uninstallation or formatting.
If all the purely technical aspect should seem ostic or find specific glitch, sign up and ask for advice from the rich official Reddit community.
FAQ – Frequently Asked Questions about Dolphin Emulator
What are the minimum requirements to use Dolphin Emulator on PC?
Dolphin Emulator is a well optimized software and does not require high-end hardware specifications. To get a very smooth and snap-free experience, a recent four-core CPU is highly recommended, a minimum amount of 2 GB RAM, a 64-bit operating system and a dedicated video card compatible with DirectX 11.1 or OpenGL 4.4 standards. Modern computers, even mid-range or entry-level, can emulate almost the entire GameCube and Wii title park with ease and stability.
Is using Dolphin Emulator considered illegal?
The emulator software itself, as a program that replicates the architecture of a system, is perfectly legal. The debate and the potential copyright infringement concern only the acquisition of games, i.e. files in ROM or ISO format. The practice currently accepted and considered legitimate by law provides for the personal extraction (through the dumping process) of digital data by taking them directly from the original physical disks that the user has purchased and owns at home.
Can I use the original Wii and GameCube controllers to play on computer?
Absolutely, indeed it is the best solution. To use an original GameCube joypad on a computer, you must have a dedicated USB adapter, as the connector is not standard. The Wii (Wiimote) remote controls, on the contrary, are interfaced via native Bluetooth technology, allowing you to pair them directly to your PC's wireless card, to which you will only be joined by a comfortable USB or Wireless Sensor Bar to faithfully replicate the original infrared pointing system.


