Dolphin Emulator is a software solution that allows the emulation of Nintendo GameCube and Nintendo Wii consoles on different platforms. It is one of the most recognized and widely used emulators for these specific consoles. Even for those with the latest Nintendo platforms, such as the Nintendo Switch, interest in retro titles can be high. Dolphin offers the opportunity to access a wide library of games of the past.
This guide provides detailed instructions on how to download, install and configure Dolphin Emulator on PC running Windows, Mac and Android devices.
Download and Install Dolphin Emulator on Windows and Mac
Dolphin Emulator can be installed on the most popular desktop operating systems. Below are the procedures for each platform.
On Windows: The beta version (Recommended)
For installation on Windows PC, there are two main modes: the traditional installation via setup executable and the use of a portable version. The portable beta version is generally recommended as it receives more frequent updates and is actively developed.
Below are the steps for the installation of the portable version (referred to Windows 11, but applicable with small variations also to previous versions):
- First, a software is required to extract compressed archives in .7z format. We recommend the use of 7-Zip. You can download the 64-bit version (Windows x64) from official website of 7-Zip and proceed with standard installation.
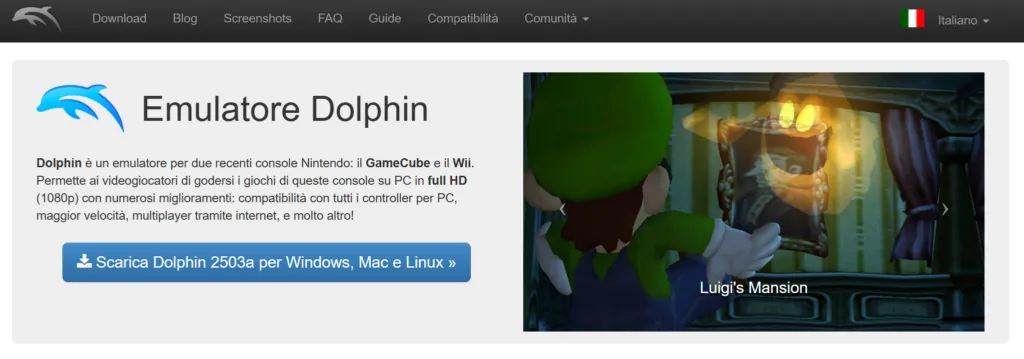
- Next, you access the download page on official website by Dolphin Emulator.
- You will locate and select the most recent beta version, usually located at the top of the list.
- Click on the button Windows x64 to start downloading the file.
- Once you complete the download, you will open the “Download” folder and locate the downloaded file (with .7z extension).
- Right-click the file, select “Show other options”.
- From the context menu, you pass the mouse on 7-Zip and select the option Get out here..
- At the end of the extraction, a folder containing all the files necessary for the emulator will be available.
- Note: As a portable application, a traditional installation process is not required. To start the emulator, just double-click the executable file called Dolphin.
Tip: As a portable application, the directory containing Dolphin files can be moved to any desired location to facilitate access. It is common to place it on the desktop or inside the “Documents” folder.
On Mac: Similar procedure for portable version
Also on Mac, the installation is similar to using a portable application on Windows. The beta version is recommended to take advantage of the latest developments.
Below are the steps:
- It is accessed the official website of Dolphin.
- Download the latest beta version by clicking the button macOS (ARM/Intel Universal). This package is compatible with both Apple Silicon chip-based Macs (M1, M2, etc.) and Intel processors.
- Once you complete the download, you navigate to the “Download” folder and locate the DMG file of Dolphin Emulator.
- You double-click the DMG file to open it, thus mounting the disk image.
- Inside the disk image, there is the Dolphin application icon. You double-click the icon to start the application.
Note: The macOS system could show a security notice about downloading from the Internet. To proceed, simply click on Open it..
Configuration of a directory for games (on PC and Mac)
Creating a dedicated folder to store game ROM files is an important step for organization and valid for both platforms.
- You choose a location on the computer where to create the folder (the desktop or folder “Documents” are common options).
- Right-click in an empty space, select New and therefore Folder.
- A descriptive name is assigned to the folder, such as “Dolphin ROMs” or “Giochi Dolphin”.
- Dolphin Emulator starts. An area will be shown in the window with the indication to double-click to add a folder. You double-click in this area.
- You navigate to the previously created folder and select it.
- Dolphin will automatically configure this folder to detect and add to the list any GameCube or Nintendo Wii ROM that will be copied.
Tip: The configuration of a dedicated ROM directory is recommended regardless of the platform used (PC or Mac) for better file management.
Completed this stage, you are ready to add the games and further configure the emulator.
How to start a game with Dolphin Emulator
Before you can play, you must have a ROM file of the desired game. As already specified and here reiterated, the legality of the origin of ROM files falls into a controversial area. The legally most accepted practice involves the use of ROMs extracted from original physical copies of the games. No indications will be given on how to get such files.
Once you have the ROM file, starting the game is a simple procedure:
- You copy the ROM file to the previously configured folder as a game directory.
- Dolphin Emulator starts. The emulator should automatically detect the new game and display it in the list.
- You click on the game title you want to start.
- Click on the button Play located in the upper toolbar.
- The game should start.
Generally, Dolphin Emulator is configured by default to ensure a satisfactory gaming experience without the need for many initial changes. However, to optimize the experience based on your preferences or available hardware, you can customize some settings.
Configure and Use Dolphin Emulator on Windows and Mac
A Dolphin Emulator feature is its good default configuration, which allows you to start most games with appropriate frame rate. GameCube and Wii controls are pre-maps on the keyboard. The necessary changes are generally minimal and depend on the computer hardware used.
Windows and macOS configuration options are almost identical, so the following instructions are valid for both platforms.
How to configure a controller on Dolphin Emulator
The control configuration is essential, whether you want to recap the keyboard keys for greater convenience, or prefer to use an external controller. The use of a GameCube controller wired with a USB adapter is often recommended, given the special three joystick configuration of the GC controller that does not fit perfectly to the paired mouse and keyboard.
Below are the steps to configure controls:
- Dolphin Emulator starts.
- Click on the icon of the Controller located in the upper toolbar.
- Two main sections are displayed: the upper section for GameCube controllers and the central one for the Nintendo Wii controller (Wiimote).
- Click on the button Configure for the controller you intend to customize (typically you start with the GameCube Controller 1).
- On the next screen, the list of all available inputs for the selected controller (pulsants, joysticks) is shown. Click on each item in the list and then press the corresponding key on the keyboard or external controller to assign the mapping. You should devote the time you need to configure inputs according to your preferences.
- Optional: To save different controller configurations (for example, one for the keyboard and one for a specific controller), you use the “Profile” box on the right side of the window. Type a profile name and click on Save. You can upload saved profiles later.
- Once you complete the changes, click on OK..
Note: The emulator automatically switches from the configuration of the GameCube controller to the Wii controller according to the game started.
The controller configuration screen may appear complex initially. It is recommended to explore the options calmly. If you commit errors in the configuration, you can always reset the original settings by clicking on the button Predefinition (Default).
How to configure graphic settings on Dolphin Emulator
Default graphics settings are generally efficient and on many modern computers allow you to perform high frame rate GameCube/Wii games. However, you may need to make adjustments to optimize performance or improve visual quality according to the hardware available.
- Dolphin Emulator starts.
- Select the option Graphics in the upper toolbar.
- A window opens with four tabs: General, Improvements (Enhancements), Hack (Hacks) and Advanced (Advanced). Each tab contains several editable graphic settings.
- Useful tool: Dolphin Emulator includes tooltip that provide a brief explanation of each option when you pass over with the mouse.
- The settings are adjusted as needed. For example, in the tab Improvements, if the hardware supports it, you can try to increase the Internal resolution (Internal Resolution) to get a sharper image. Other settings such as anti-aliasing and anisotropic filter, always available in this tab, can further improve the graphic appearance.
- Once you complete the changes, click on Shut up..
By default, Dolphin tends to favour efficiency compared to the highest quality graphics. Many advanced graphics settings are disabled. If you encounter performance issues, the options for reduce further the load on the hardware are not numerous, but if you have a powerful PC, there are many possibilities for improve the visual impact.
Other configuration options
Dolphin Emulator offers a general configuration menu with additional options. This menu is accessible by clicking on Options at the top of the window and selecting Configure. The settings here do not generally require changes, unless specific needs or operating problems. Below are the main tabs:
- General: Contains basic configurations such as multi-core ability or option to skip unnecessary frames (idle skipping). These settings generally do not require change.
- Interface: It allows small customizations to the appearance and behavior of the emulator user interface. For example, you can activate a confirmation request before leaving to prevent unsaved data loss.
- Audio: This section manages audio settings. Changes are only necessary in case of sound problems, such as shots or distortions.
- GameCube and Wii: Two cards with specific options for their respective consoles, such as memory card management (GameCube) or region settings (Wii).
- Paths: Defines or edits the directories from which Dolphin uploads the game files and other necessary resources.
- Advanced: This tab contains the option for the Overclocking of the emulator. The increase in this value can increase the frame rate in some scenarios, but it involves a greater load on the CPU. The use of this option requires caution and adequate hardware.
- Log / Debug: These tabs contain settings for event recording and debugging, which are mainly useful for complex problem development or resolution purposes.
Dolphin Emulator is generally well configured by default. The main areas of user intervention are the configuration of controllers and, if the hardware allows, customization of graphic settings.
Download and Install Dolphin Emulator on Android
Modern smartphones have sufficient computing power to perform advanced emulators like Dolphin. It is one of the best emulators available for Android users interested in Nintendo GameCube and Wii titles.
The installation of Dolphin Emulator on an Android device is a very simple procedure:
- You can access the Dolphin Emulator page on Google Play Store.
- Touch the button Install, similar to any other application.
- Alternatively, you can download the APK file (usually a beta version) from the official website of Dolphin Emulator and proceed with manual installation. This procedure may require installation authorization from unknown sources in the device’s security settings.
The installation via Google Play Store is generally recommended as it guarantees regular automatic updates, including those of the latest beta versions.
Create a directory for ROMs on Android
As with desktop platforms, it is advisable to create a dedicated folder on your phone memory to store the game files. This facilitates file management and backup.
- Opens a file manager application (like “Files” Google or alternatives like Solid Explorer).
- You navigate within the internal memory of the device.
- You create a new folder through the file manager. You are given a recognizable name, such as “DolphinGames” or “ROMsWiiGC”.
- You move the game files (ROM) within this new folder.
Important: Dolphin Emulator on Android cannot read compressed files directly in ZIP format. If the game files have been downloaded in .zip format, you must extract the content before copying them to the designated folder.
Tip: To facilitate backup of games in case of device change, it is useful to use a cloud sync application or periodically copy the ROM folder on a computer.
Although not strictly mandatory, using a dedicated ROM folder significantly contributes to file organization and reduces the risk of accidentally deleting games while cleaning the “Download” folder.
Configuration of Dolphin Emulator on Android
The Dolphin Emulator configuration experience on Android follows desktop versions. Default settings are generally adequate, and customizations focus mainly on controls and, if necessary, on performance optimization for the device in use.
Configure controls on Dolphin Emulator (Android)
On Android, the user has two main input options: use virtual controls displayed on the screen or connect a hardware controller. The procedures for both modes are described below.
Customization of screen controls:
- It starts Dolphin Emulator and opens a game.
- Once the game is started, you can access the Dolphin menu by scrolling from the edge of the screen (usually to the left) or pressing the “Back” button of the device (depending on the model and configuration).
- From the menu, select the option Overlay controls (Overlay Controls).
- Shift of controls: Touch. Edit Layout (Edit Layout). You can then drag the virtual buttons on the screen to place them according to your preferences. At the end of the changes, you touch Done (Done).
- Resize and opacity: Touch. Control Rule (Adjust Controls). Sliders are displayed to change the size and transparency of the buttons.
- Hide screen controls: From the Overlay Controls menu, tap Enable/Disable Controls (Toggle Controls) and then the button Active/Disable All (Toggle All) down. This option is particularly useful when using a hardware controller and you want to remove the overlap of virtual controls.
Note: Customization (position, size, opacity) must be done manually for each game the first time it is started. If the controls are hidden for a game and then this is restarted without controller, you will need to reactivate them manually.
You can access more specific settings for hardware controllers by tapping the gear icon in the Dolphin main screen and selecting “Input GameCube” or “Input Wii”.
Configuration of hardware controllers (Bluetooth, USB, etc.):
- Turn on the desired controller and connect it to the phone via Bluetooth or USB connection.
- Start Dolphin Emulator and tap the icon in the shape of the Gear (Cogwheel) up.
- Access to the section Input GameCube (GameCube Input).
- Touch. GameCube 1 controller and select the option Emulated (Emulated).
- The list of all inputs from the GameCube controller is shown. Tap on each button in the list and press the corresponding button on the physical controller to assign the mapping. This procedure requires manual mapping of each input.
- Complete the configuration for the GameCube, you go back.
- Select Input Wii (Wii Input) and repeat the previous steps for the Wii controller (Wiimote and Nunchuk).
- Once finished, you leave the menus, start the game and use the configured controller.
Tip: To hide the controls on screen when using a hardware controller, you start a game, you open the menu (on the side), you access Control Overlay, then turn on/off Controls and tap the Active/Disable All button down. There are also advanced options for using specific adapters (such as the official GameCube adapter for Switch/Wii U), which however require the purchase of the corresponding hardware.
Configuration of graphic settings on Dolphin Emulator (Android)
In most cases, you don’t need to change Dolphin’s graphic settings on a modern Android device, as default settings are optimized for a wide range of hardware. However, if you want to make changes, the options are available here:
- Start Dolphin Emulator and tap the icon in the shape of the Gear.
- Touch. Graphic settings (Graphics Settings).
- Several options are available. In case of performance problems (clicks in the game), one of the few options that could be modified is the Shader Filling Mode (Shader Compilation Mode). This option can help reduce general slowdowns, but it could cause short initial shots while loading new graphic elements. Developers generally recommend it only on very low-end hardware.
- Improvements (Enhancements): Includes various options to improve fluidity and visual quality. The option Internal resolution can significantly increase image sharpness if the device supports it.
- Hack (Hacks): Options to improve performance or graphic quality. It is recommended to read the descriptions carefully (accessible via tooltip by holding down on the option) before activating or deactivating them.
- Statistics: Displays indicators such as FPS (frame per second), VPS (video per second) and emulation speed, useful to monitor the impact of the changes made. These options do not affect the performance of the game.
- Advanced (Advanced): This menu contains options for enabling custom texture packs, mods and other less common settings. Some of these options can affect performance.
This menu offers a wide range of configuration possibilities, and each setting is accompanied by a description (through tooltip). You can explore and experience the options to find the optimal balance between performance and visual quality for your device.
Other configuration options (Android)
There are additional general settings accessible by tapping the gear icon and selecting Config (Configuration).
- General: Basic settings that rarely require changes. It is here that you can enable “Save States” (Save States), although developers do not recommend use due to the potential instability in some games.
- Interface: Settings for the emulator user interface, including the option to change the app theme.
- Audio: Manages audio settings. The changes are recommended only in the case of audio shots; in this case, the ability of the option Audio Stretching Could solve the problem.
- Paths: It lets you define the directories from which Dolphin uploads files and where it saves user data. It is also useful to identify folders to include in backups.
- GameCube: Specific settings for GameCube, such as virtual memory card management.
- Wii: Specific settings for Wii, such as inserting a virtual SD card or configuring the region.
- Advanced (Advanced): Enables settings required by specific games (such as MMU) and the overclock option of the emulator. Overclocking on mobile devices is not recommended for reasons related to battery life and overheating.
- Log: It allows to determine which logs are written and their destination.
- Debug: Debug settings that are not generally relevant to the average user.
- User Data (User Data): Important option! It allows importing or exporting user data (savings, configurations) to prevent loss in case of uninstallation of the app or device change. Periodic use is strongly recommended for backup.
There are other less common configurations, but similarly to most emulator settings, do not generally require changes to less specific problems. In case of difficulty, the official Dolphin subreddit (reddit.com/r/DolphinEmulator) is a useful resource for assistance.
FAQ – Frequently Asked Questions
Is my PC able to run Dolphin Emulator?
Generally speaking, it is likely to be. Dolphin Emulator does not have particularly high minimum requirements. It is recommended to use a quad-core CPU with a good frequency, at least 2 GB of RAM and a graphics card compatible with the DirectX 11.1 or OpenGL 4.4 specifications. A 64-bit operating system is also required. Many computers produced in recent years, equipped with dedicated graphics card, should be able to perform a wide range of games.
Is the use of Dolphin Emulator illegal?
No. The act of using an emulator and ROM files is not considered illegal in itself. The question of legality focuses more on the method of acquiring ROM files. The legally safest position is to use ROM files extracted independently from physical copies of legally owned games. Despite the ongoing legal debate, the use of the emulator generally does not entail direct legal consequences in most jurisdictions.


