
Sharing local network resources is a common operation in business and household environments. The Windows operating system offers integrated features for sharing files and folders, allowing authorized users to access shared resources from different locations. The process of configuring a shared folder and access management involves a number of fundamental steps, which will be discussed below.
Preliminary phases for Sharing
Before you proceed with sharing a folder, you must ensure that your network infrastructure is properly configured. This includes enabling file sharing and printers at the operating system level and verifying that any firewalls on the network do not block traffic related to the Server Message Block (SMB) protocol, used for file sharing and printers in Windows environment.
Subsequently, it is essential to define which users need access to the shared resource. In line with the best cybersecurity practices, we recommend creating dedicated user accounts for accessing shared folders, avoiding providing the credentials of personal user accounts.
Configuration of Network Settings
The ability to share files and printers is carried out through the Network and Sharing Center, accessible by the Control Panel. Within this section, you must select the option “Edit Advanced Share Settings”. Windows distinguishes between different network profiles (Private, Public and Domain), each with default security settings. To share resources in a trusted local network, you need the active network profile to be set to “Private”.
In the “Private” profile, you need to activate the following options:
- Enable network detection: allows other devices on the network to detect the presence of the computer.
- Enable file and printer sharing: enables resource sharing capabilities via SMB protocol.
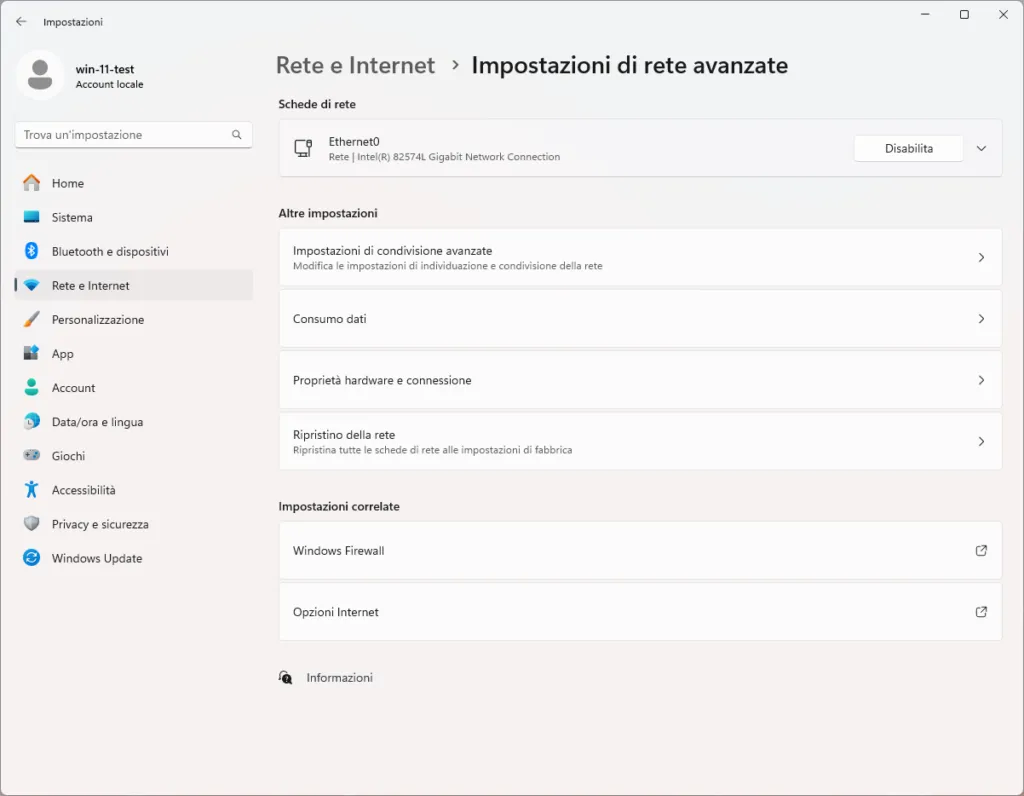
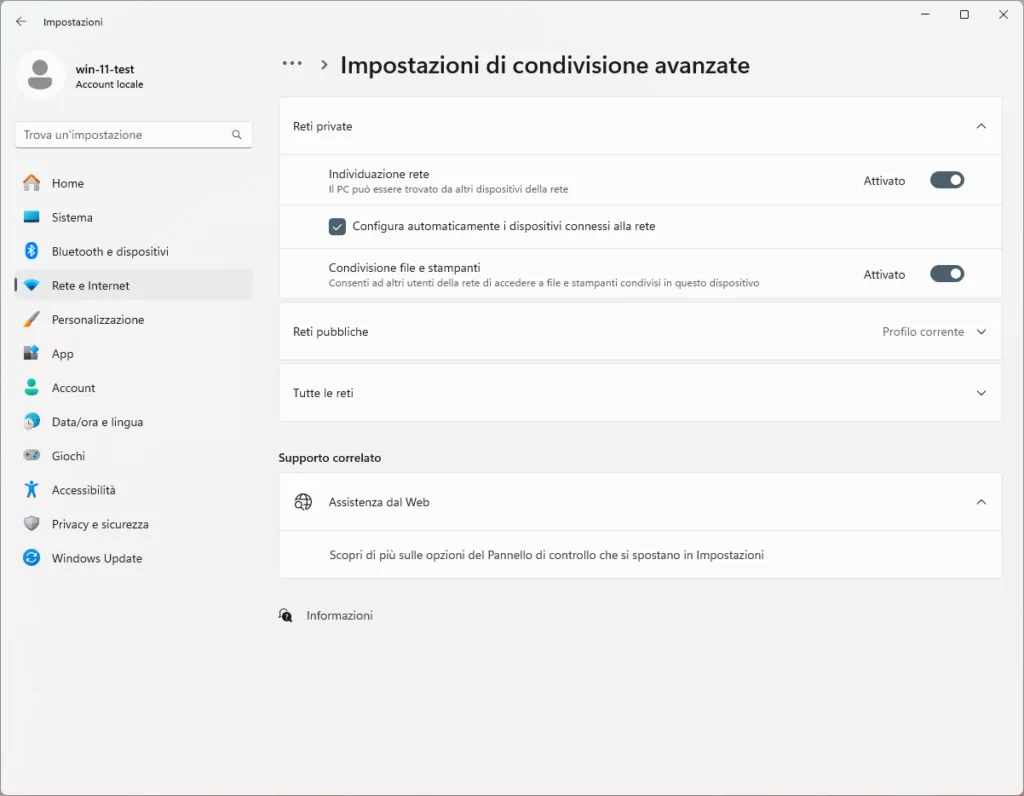
These settings must be configured both on the computer that will host the shared folder (SMB server) and on computers that will access the resource (SMB clients).
Creating Users and Groups
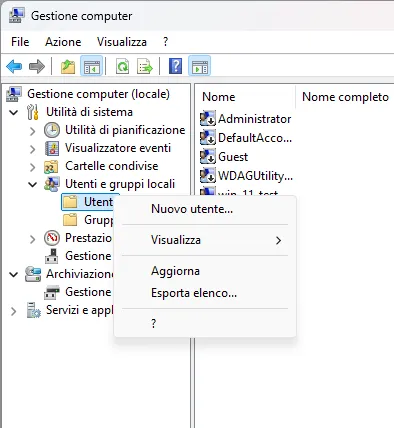
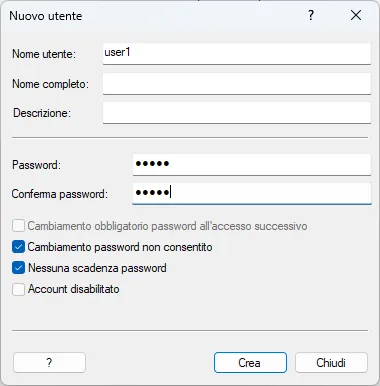
For more efficient access management, it is advisable to create user accounts specific to share. This can be done through the “computer management” tool, accessible via the context menu of the “This PC” icon or via the command-line command. In the “computer management” window, select “local users and groups” and then “users”. Right-clicking on the “User” section and selecting “New User”, you can create new accounts by specifying a username, password and account management options.
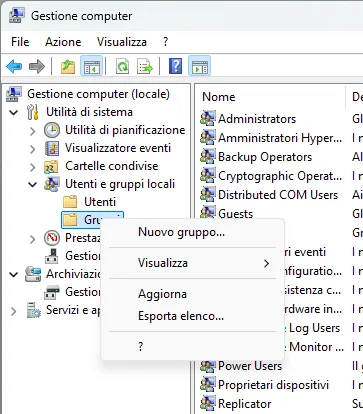
To further simplify permission management, you can create user groups. In the “Local Users and Groups” section, select “Groups”. By right-clicking on the “Groups” section and selecting “New Group”, you can define a name for the group and add to it users previously created. The use of groups allows to assign the same permissions to multiple users at the same time, facilitating the administration of accesses.

Share of a Folder
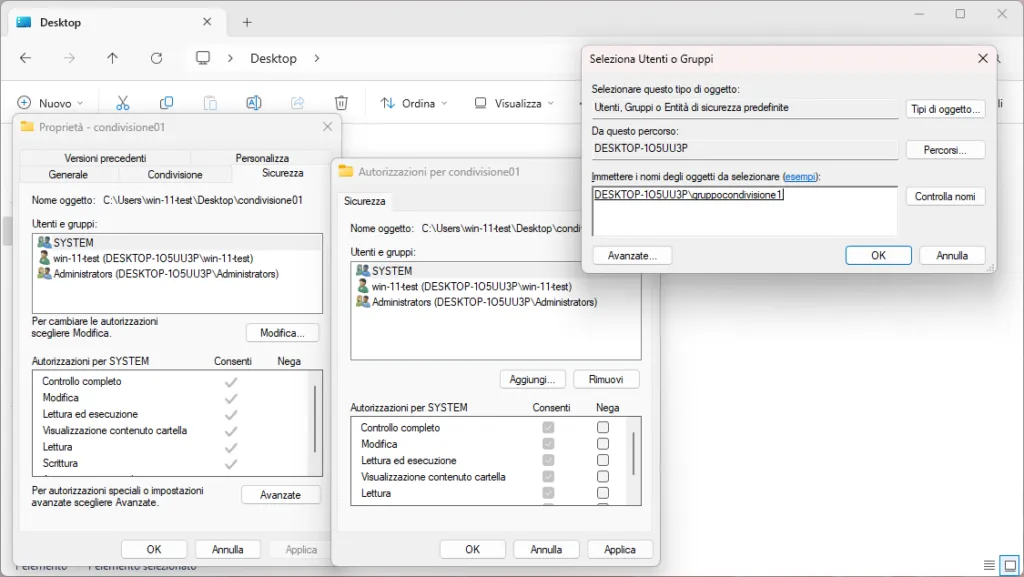
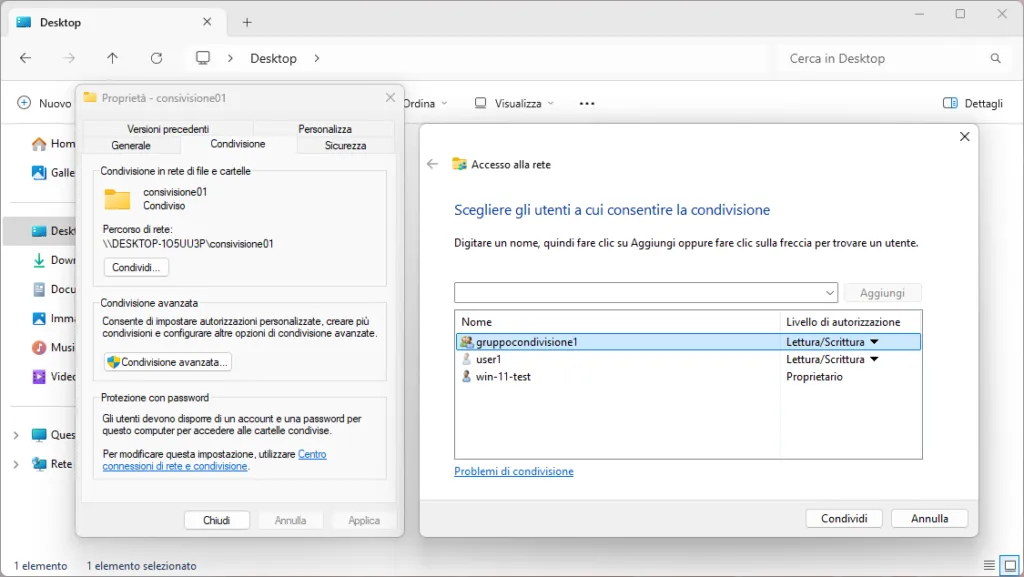
Once you complete the preparation steps, you can proceed with the desired folder sharing. Right-clicking the folder and selecting “Properties”, you access the folder property window. Select the “Sharing” tab and click the “Advanced Sharing” button.
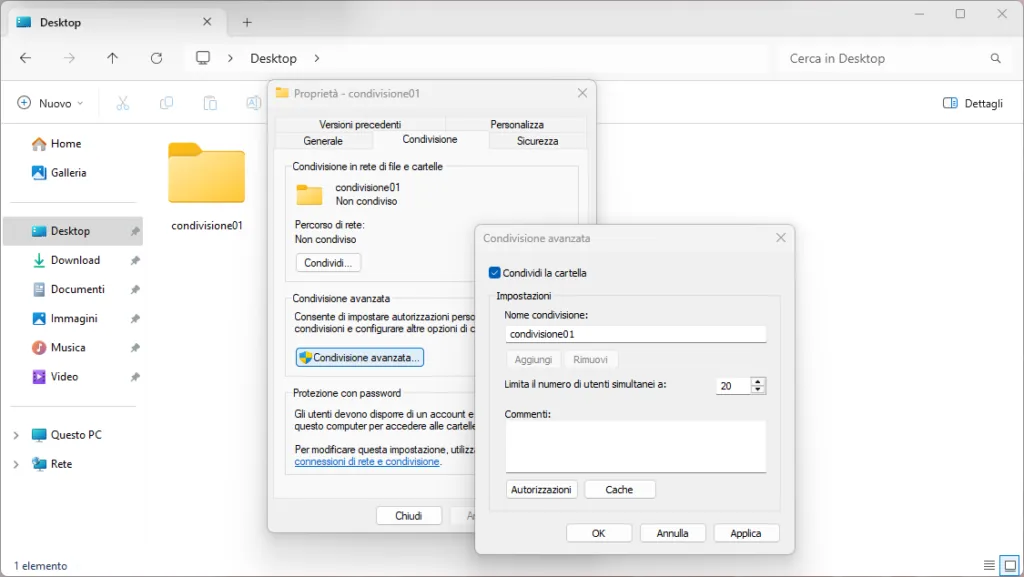
In the “Advanced Sharing” window, select the “Share this folder” check box. You can specify a sharing name, which will be the name with which the folder will be visible on the network. To configure access permissions at the SMB protocol level, click the “Settings” button.
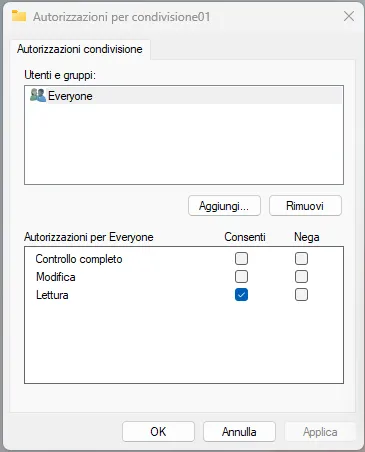
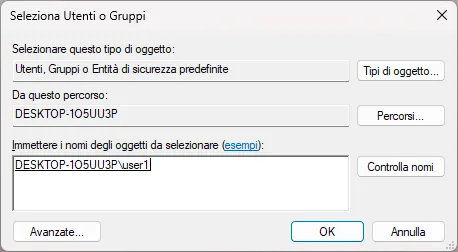
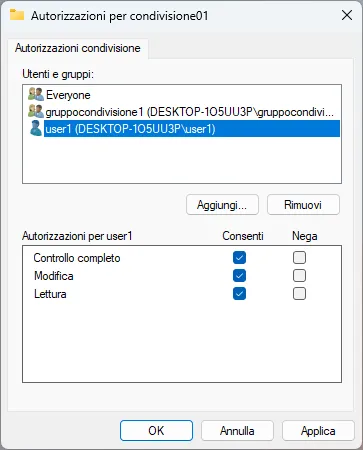
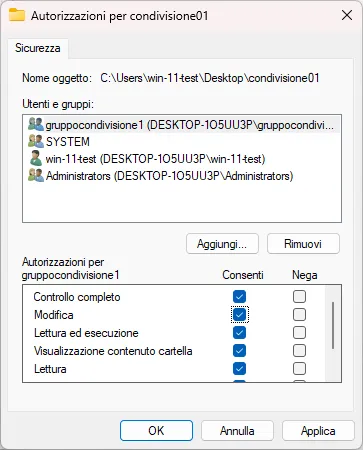
In the “Security permissions” window, you can define which users or groups will have access to the shared folder and which permissions. By default, the “Everyone” group has read-only permissions. It is recommended to remove this default setting and specifically add users or groups that need access to the resource, assigning them appropriate permissions (for example, “Full Control”, “Edit”, “Letture”).
In addition to SMB-level sharing permissions, it is essential to configure file system-level permissions (NTFS). In the folder Properties window, select the “Security” tab and click the “Edit” button. In this section, you can add users or groups and define access permissions to files and subfolders within the shared folder. It is important to note that NTFS permissions can further restrict access, although SMB sharing has been granted larger permits.
Access to the Shared Folder
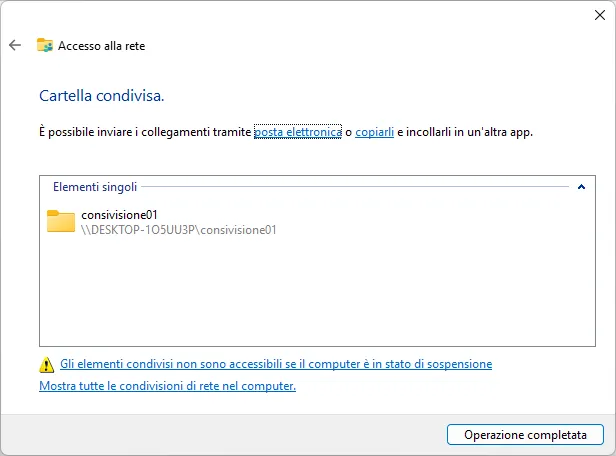
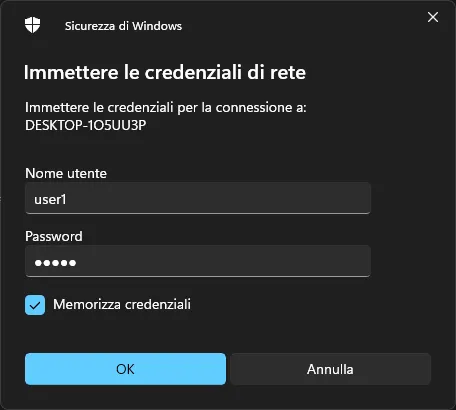
Once sharing is configured, you can access the folder from other computers on the network. To do this, you can use File Explorer and type in the address bar the computer network path that houses the shared folder, using the syntax \\IndirizzoIP or \\NomeComputer. Alternatively, you can directly specify the UNC (Universal Naming Convention) path of the shared folder, for example \\IndirizzoIP\NomeCondivisione or \\NomeComputer\NomeCondivisione.
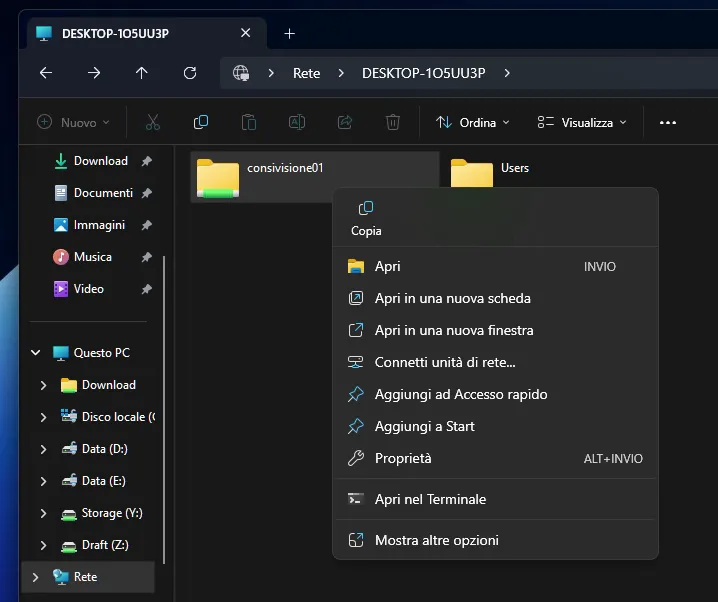
Mapping of a Network Unit
For more convenient and quick access to shared folders used frequently, you can map the shared folder as a network drive. This operation creates a permanent link in File Explorer, allowing you to access the shared folder as if it were a local drive. To map a network drive, you can right-click the shared folder after reaching it via the network path and select the option “map Network Drive”. You can choose a drive letter to be assigned to the shared folder and select the option to reconnect the drive to the next access.
In conclusion, sharing folders in Windows environment requires careful configuration of network settings, managing user accounts and groups, and the appropriate setting of permissions both at SMB and NTFS file system level. Following these steps, you can create a secure and efficient file sharing environment.


