
Don't you like it or use Creative Cloud File folder? Follow these steps to unlock or remove the Creative Cloud Files folder from the File Explorer sidebar in Windows 10.
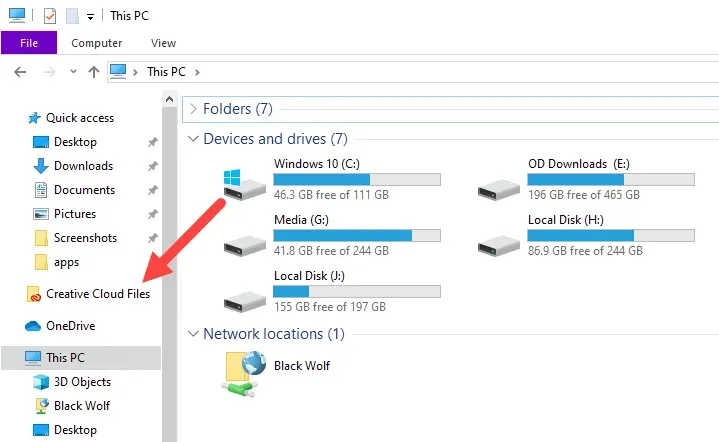
When installing a new Adobe product, such as Adobe XD or Adobe Photoshop, it automatically adds the Creative Cloud Files folder to the File Explorer sidebar. This folder is located within your home directory located in the C drive and is mainly used to store and sync your files with Adobe cloud.
If you store your files somewhere and do not use Adobe Sync, you can simply remove the folder and free space in the File Explorer sidebar. After all, the sidebar allows you to access folders and drives quickly and efficiently. Having a useless folder doesn't need anything.
So, without further delay, let me show you how to remove the creative cloud file folder in Windows 10.
Remove Creative Cloud file folder
Unfortunately, Adobe does not offer a simple way to unlock the Creative Cloud File folder. You must make changes to the Windows registry editor. Follow the steps as it is and you will be good.
Before proceeding, I highly recommend you back up the log . Backup helps you restore the registry in case of problems or if you want to restore the folder.
1. First, open the registry editor by looking for “Register Editor” in the Start menu. Alternatively, you can also use the “regedit” run command.
2. Once the Registry Editor opens, select “Computer” in the left panel. So, press C.+ Fkeyboard shortcut to open the Find tool. You can also select “Edit → Find”.

3. In the Find window, type “File Creative Cloud” and click the “Find Next”.
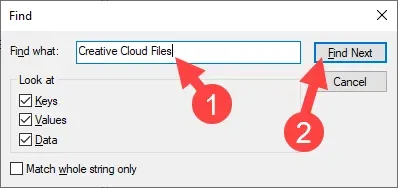
4. The previous action will look for that specific string and will take you to a folder within the folder “HKEY CLASSES ROOT”.
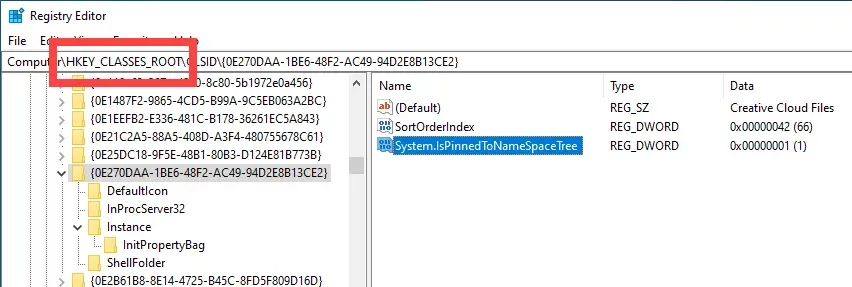
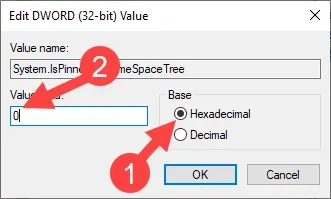
5. In the right panel, double-click the value “System. IsPinnedToNameSpaceTree”.
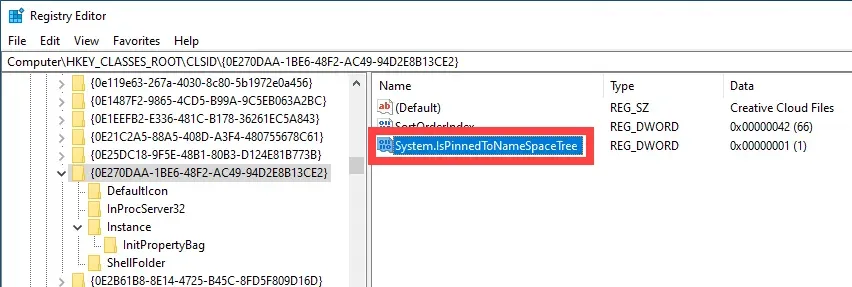
6. Type “0” in the Value Data field and click the “Ok” button to save the changes.
7. Close the Windows registry editor and Explore files if it is open.
8. Open or start File Explorer and you will no longer see the Creative Cloud File folder.
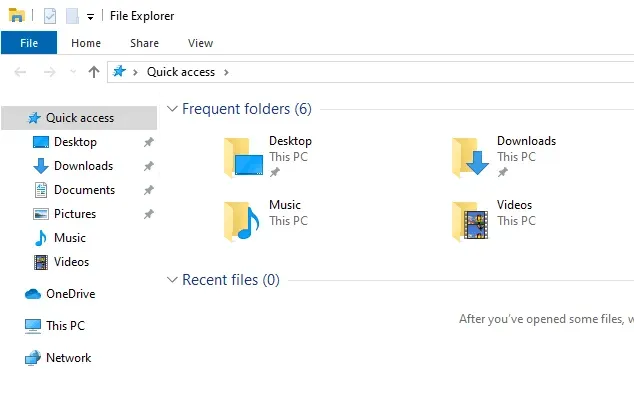
If the folder continues to be displayed, the changes may not be applied correctly. Restart the system and the folder should disappear.
Since we only unlocked the folder, you can still access it by going to “C:Utentinome Creative Cloud Files”. So, even if you're using the Adobe Sync feature, you shouldn't be hindered.
If you want to get it back, simply repeat the process and type “1” in step 6.


