Below I will list the various points to install FreeNAS on your own hardware. You don’t need a super powerful machine, you also need a little dated computer, but you have to remember that it takes at least 8Gb RAM.
Download ISO
The first step is very simple to go to the website FreeNAS, register to access the free download of the ISO file.

USB creation
Completed the download we go to the site of Rufus and we download the latest version (no installation required), this program will serve to create a USB support of FreeNAS.
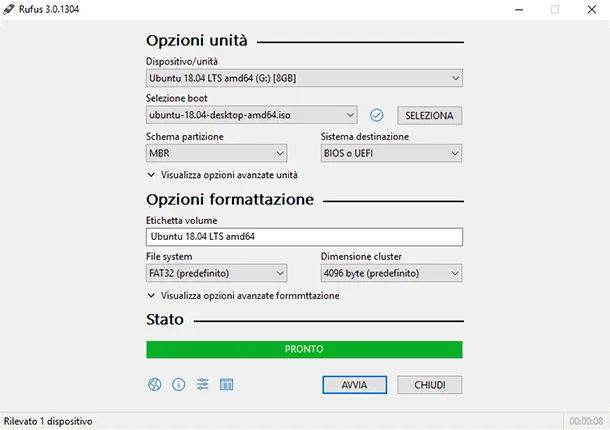
Once we start Rufus, we choose the device that is our USB and Boot (i.e. the Freenas ISO file), which we click on the start and expect it to end the process, at the end it will be enough to disconnect our USB.
Installation
With the installed support inserted, start the system from that support. FreeNAS installation program start menu is displayed
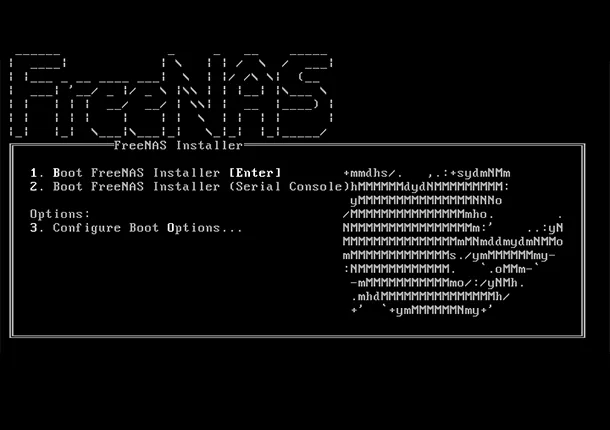
FreeNAS installer automatically starts in the default option after ten seconds. If necessary, choose another boot option by pressing the space bar to stop the timer, then enter the number of the desired option.
Once the installer has finished booting, the installer menu is displayed.
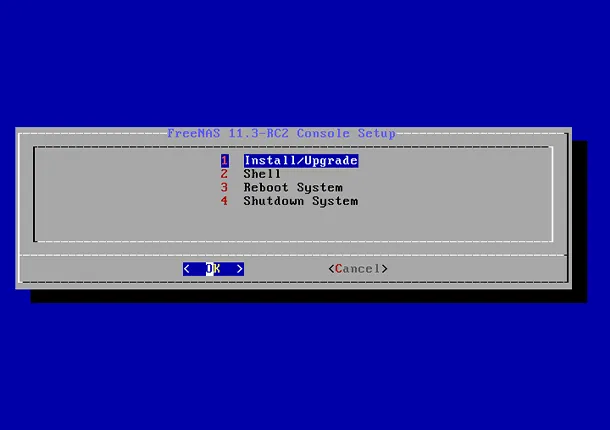
Now you have to choose whether to install the FreeNas operating system on an external USB or on an internal SATA hardisk, if you want to install it on an external USB it is time to insert it. Then press Enter to select the default option, 1 Install/Update. The next menu lists all available units. This includes all devices of the operating system inserted, whose names start with
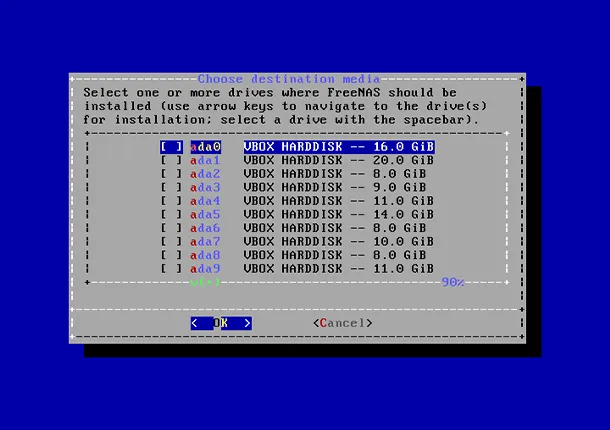
Use the arrow keys to highlight the target SSD, hard drive, USB stick or virtual disk. Press Space Bar to select it.
To mirror the operating system device, switch to additional devices and press space bar to select them too. If all selected devices are larger than 64 Gb and no one is connected via USB, a 16 Gb exchange partition is also created.
After selecting, press Enter. The notice is displayed, a reminder not to install the operating system on a storage unit. Press Enter to switch to the screen to set a password.
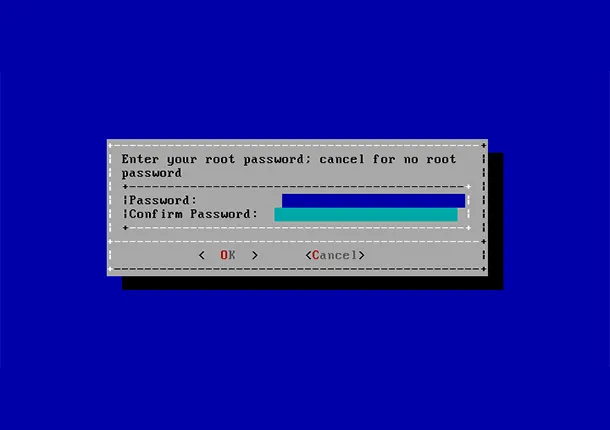
The setting of a password is mandatory and the password cannot be empty. Since this password provides access to the web interface, it must be difficult to guess. Enter the password, press the down arrow key and confirm the password. Then press Enter to continue with the installation. Choosing cancels you skip setting a root password during installation, but the web interface will require setting a root password when accessing for the first time.
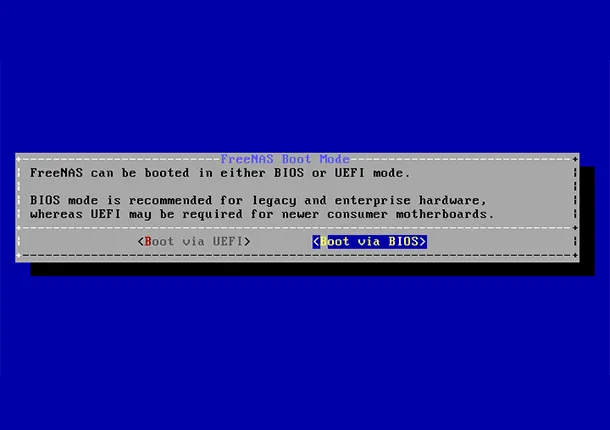
FreeNAS can be configured to start with the standard BIOS startup mechanism or UEFI startup. BIOS startup is recommended for legacy hardware and business. UEFI is used on new consumer motherboards.
At the end of the installation, the Done message appears.
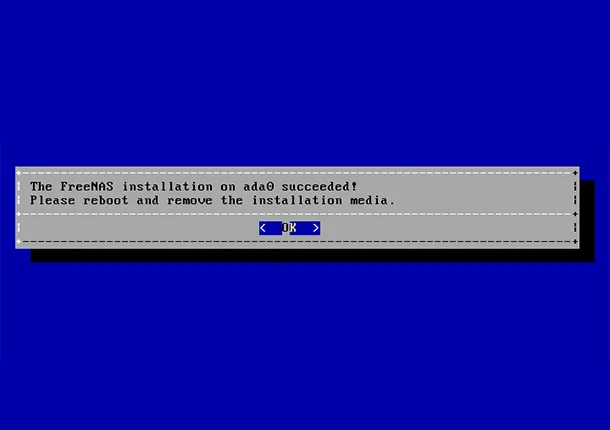
Press Enter to return to the Installer menu. If you start from CD, remove the CDROM. When the system restarts, make sure that the device on which FreeNAS was installed is listed as the first boot entry in the BIOS so that the system starts from it.
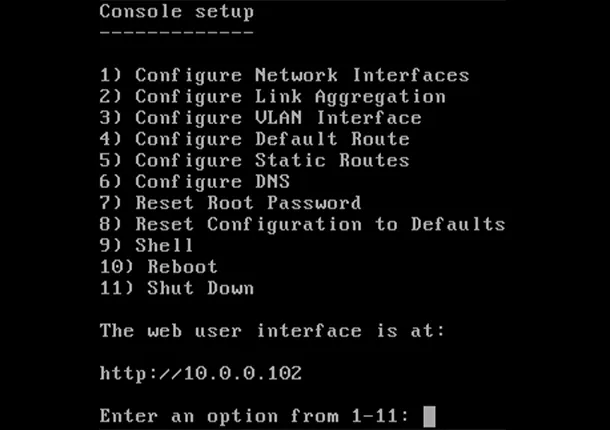
Access to the WebGUI
To access the webGUI from where to command our FreeNAS simply enter the address on the monitor connected to the FreeNAS in a search engine.