
Installing an SSL certificate on Windows may be necessary to ensure the security of HTTPS connections and enable the proper functioning of certain services.
1. Download the Certificate:
Acquire the SSL certificate you want to install. It may be provided by the service provider or website.
2. Open the Microsoft Management Console:
Right-click on “Start” and select “Run”. Type ‘mmc’ and click ‘OK’.

In the User Account Control window, click on “Yes”.
3. Add the Certificate:
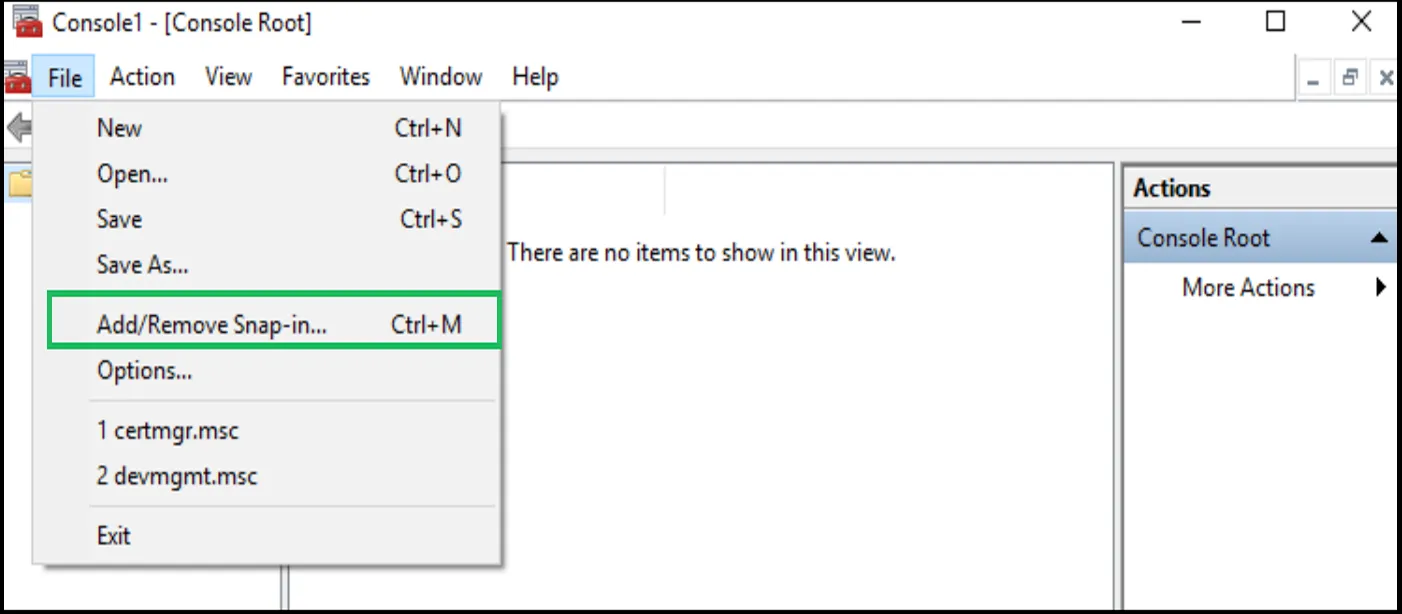
Once you open the Microsoft Management Console, click on “File” and select “Add/Remove Snap-in”.
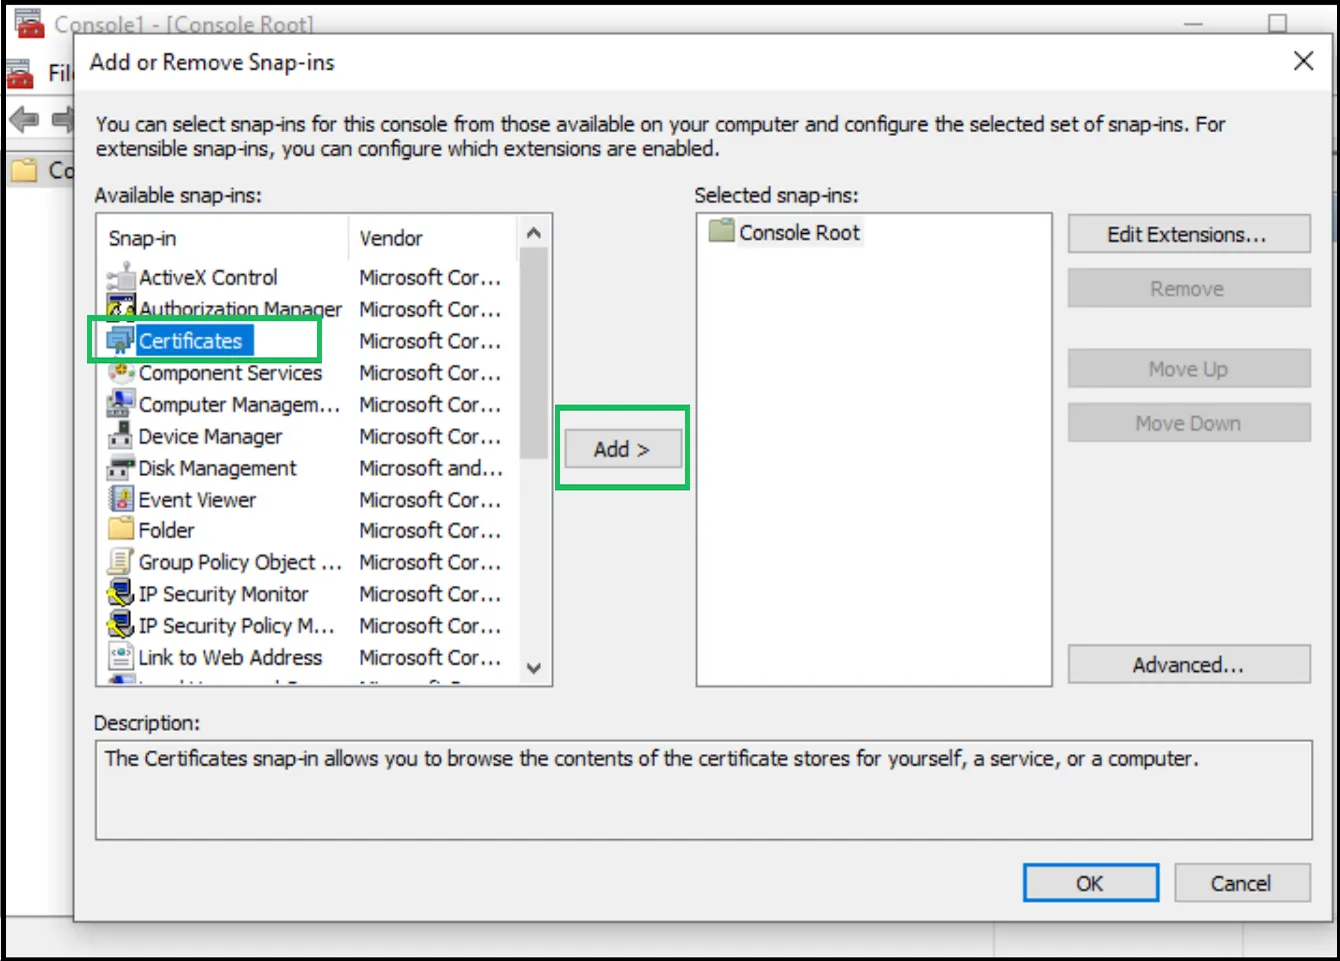
In the left menu, select ‘Certified’ and click ‘Add’.
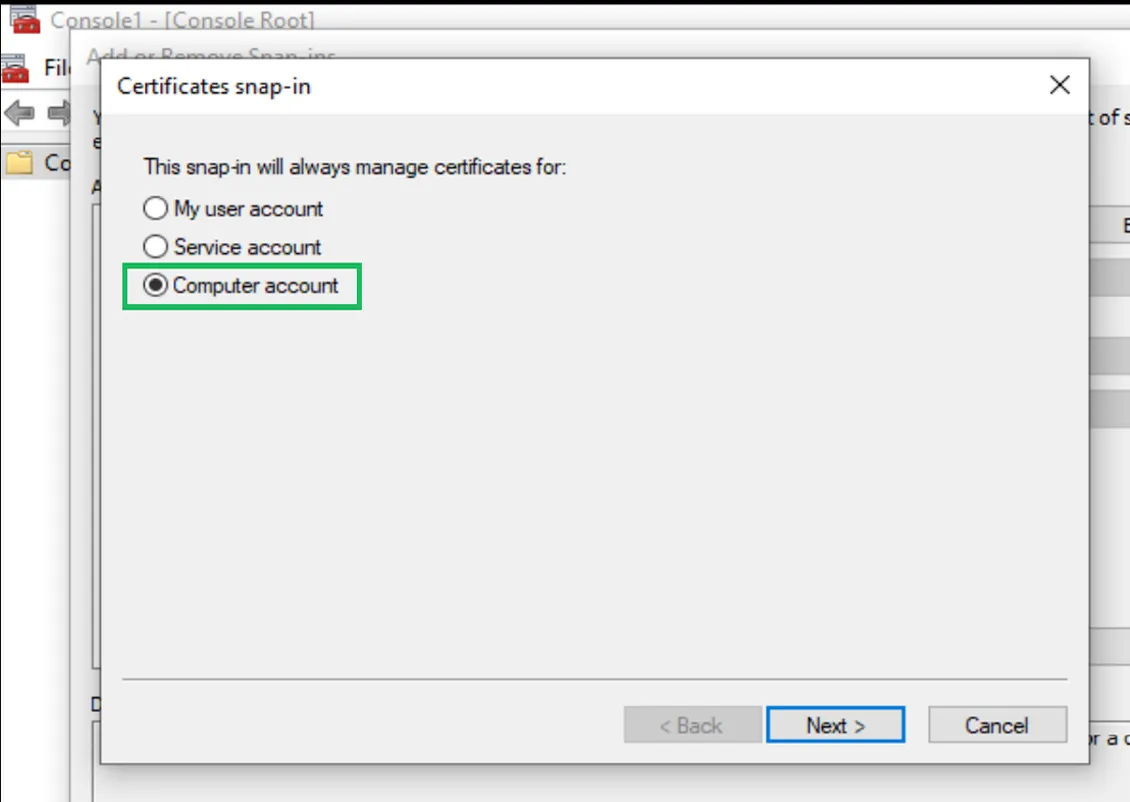
Select “Computer Account” and click “Next”, then “Fine”.
Click on “OK” in the management window.
4. Import the Certificate:
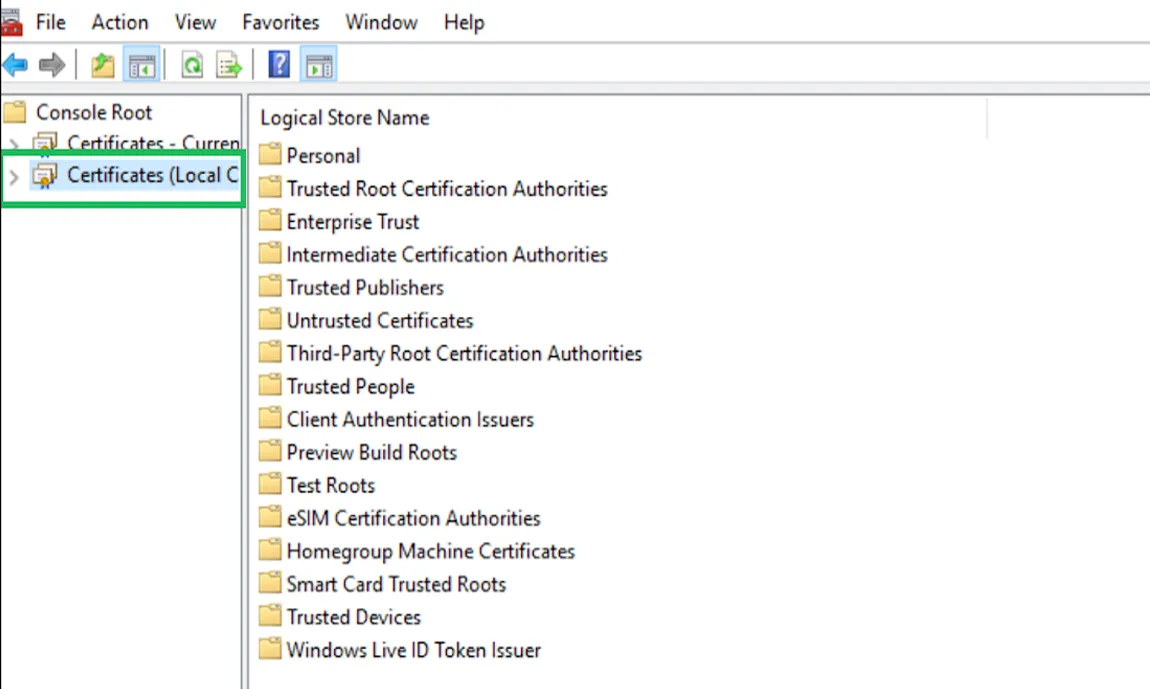
In the left pane, expand “Certified (local computer)”.
Right-click “trusted root certification authority” and select “All activities” and then “Import”.

Follow the “certificate import wizard”.
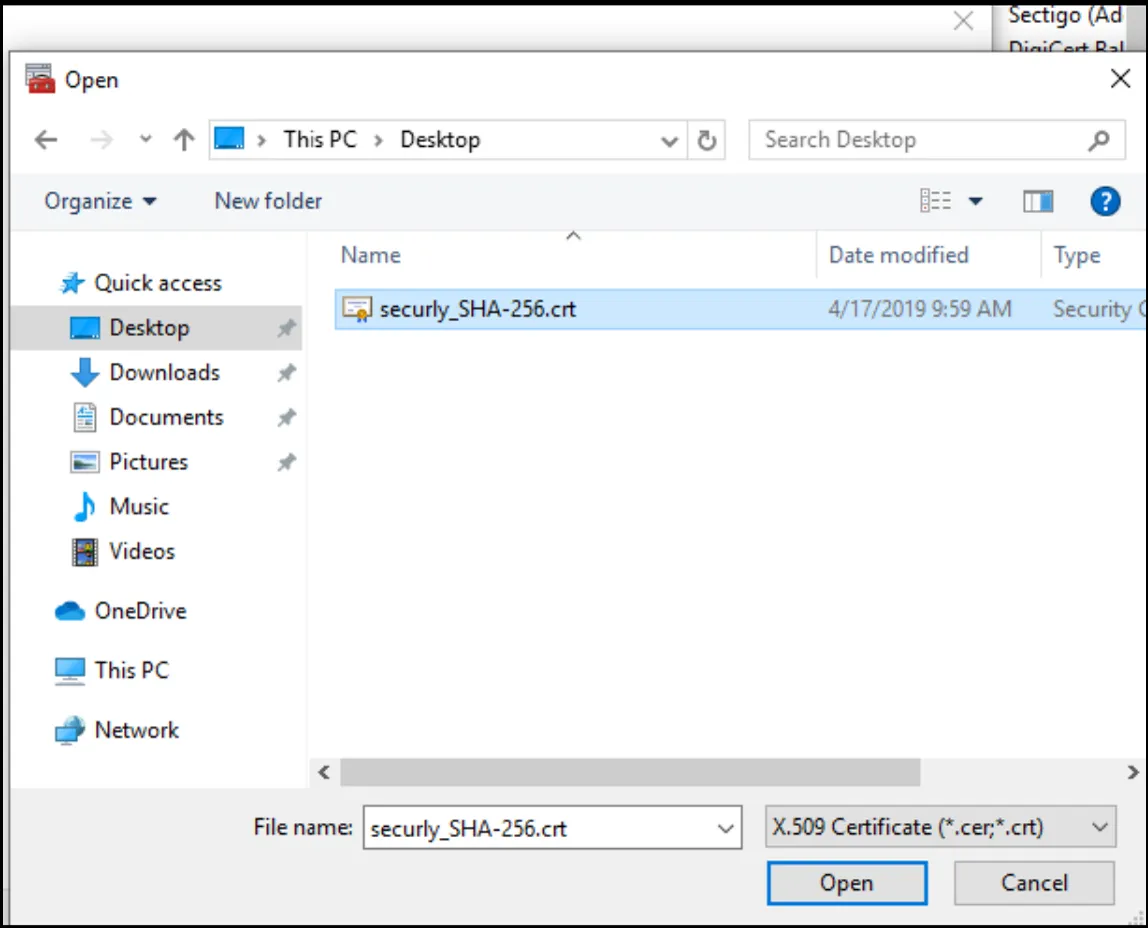
Select the certificate from your computer and click on “Open”.
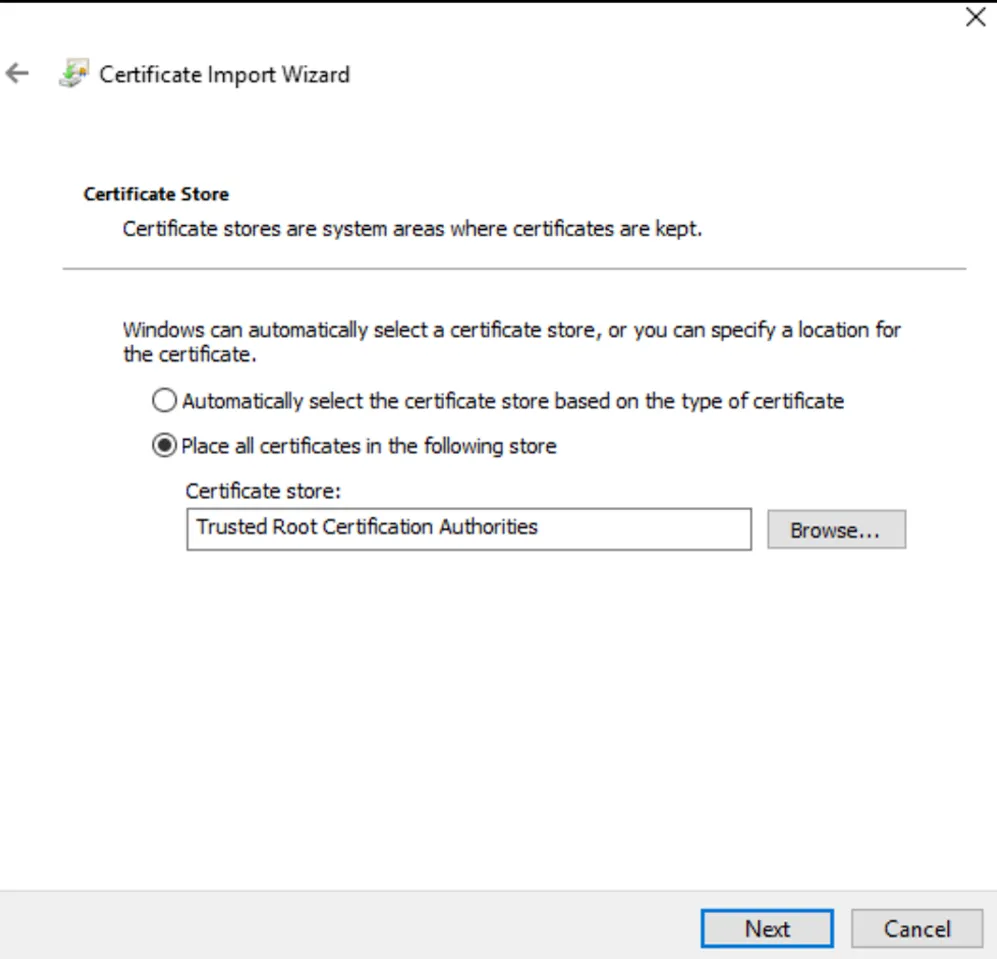
Make sure the destination is “trustworthy root certification authority” and click on “Next”, then on “Fine”.
5. Check Installation:
Open the folder “Reliable Root Certification Authority” and verify that your certificate is present.
Each certificate may have specific steps, so be sure to also consult the instructions provided by the certificate provider. This guide provides a general overview of the process of installing an SSL certificate on Windows.


